Work by Category

Hampshire-Tile-Doctor

Welcome to my Work History archive where you will find detailed examples of Tile, Grout and Stone Cleaning and Renovation work carried out through Hampshire.

To make things easier to find I have organised the posts by the most popular types of Tile and Stone. I also renovate other materials so if you’re looking for something else do get in touch as it’s highly likely we have the solution.

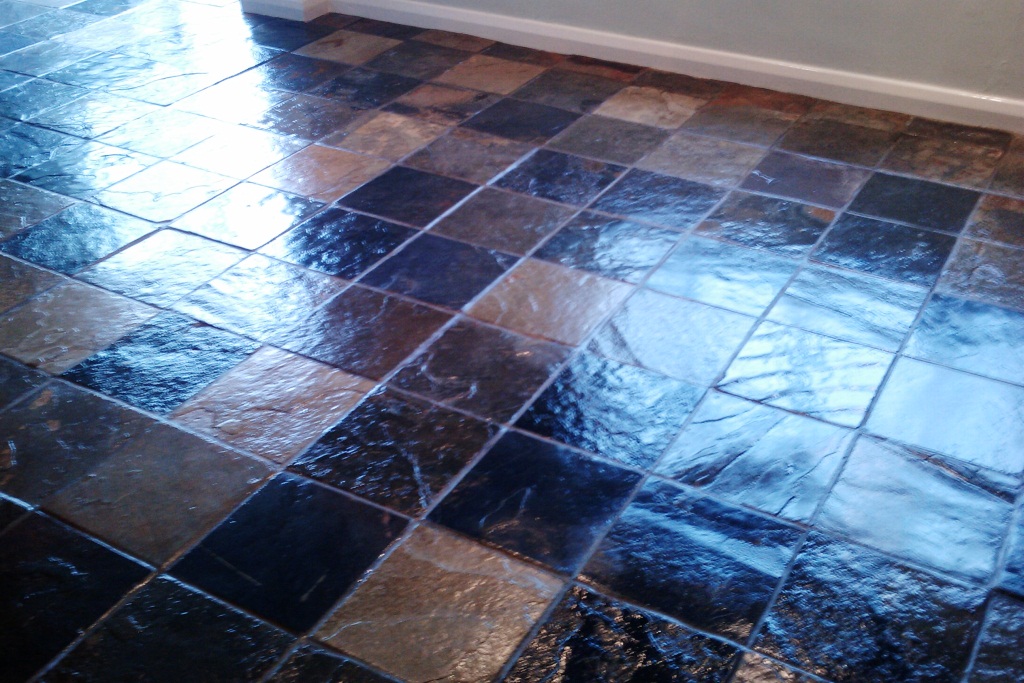
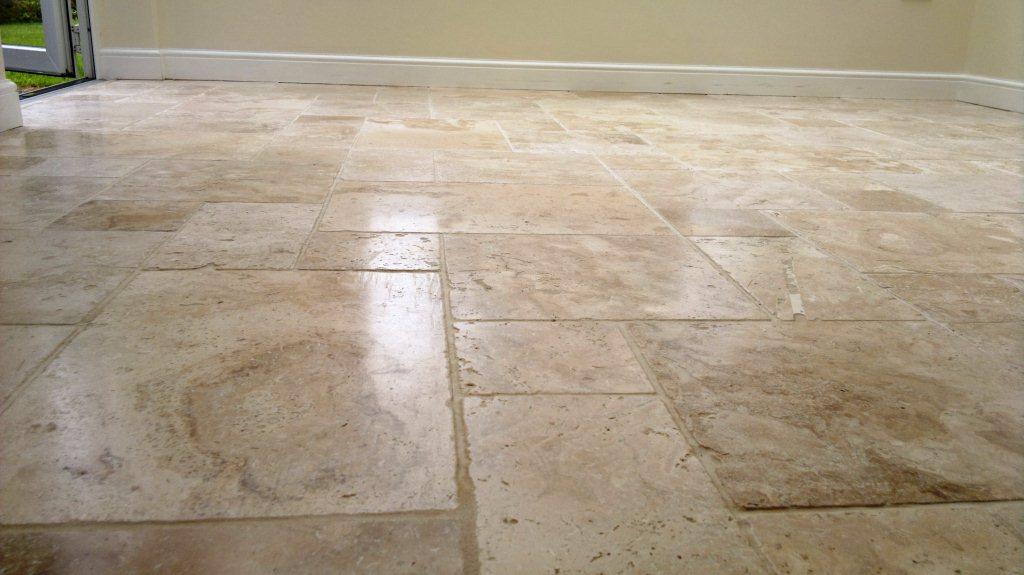
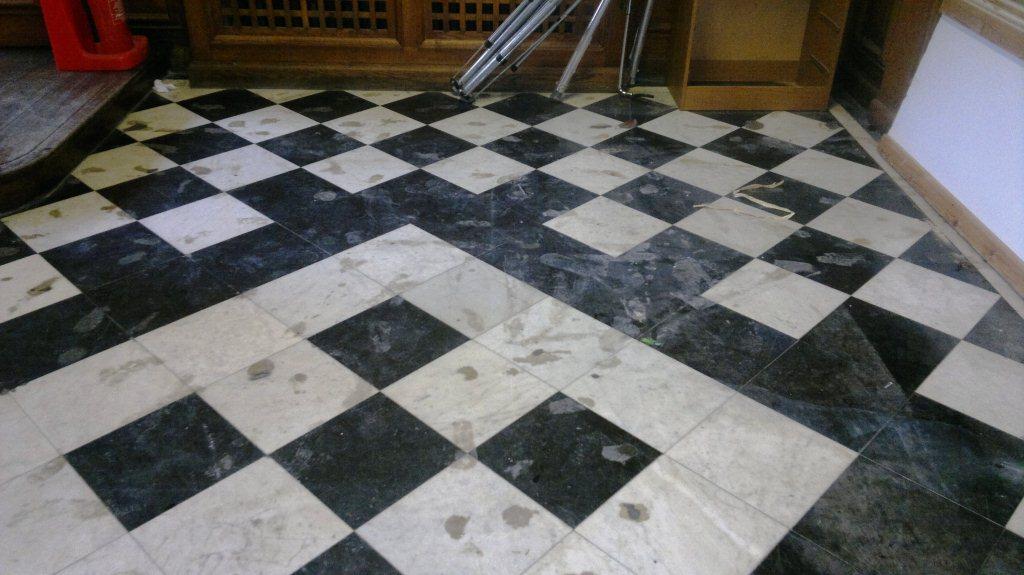
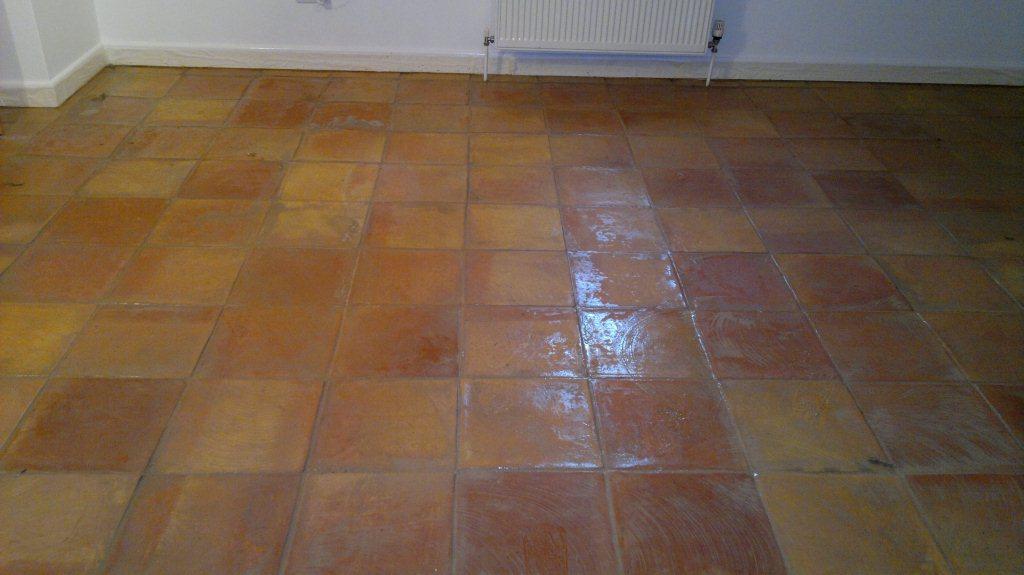
Popular requests include Ceramic Tile, Encaustic Cement, Fireplaces, Flagstone Pavers, Grout Cleaning, Limestone, Marble, Porcelain Tile, Quarry Tile, Sandstone, Slate, Terracotta Tile, Terrazzo Floors, Travertine, Victorian Flooring and Vinyl Floors.

Limestone Patio Before After Levelling Wickham

Levelling an Uneven Limestone Kitchen Floor in Wickham

The client in the small village of Wickham had recently had a new Limestone tiled floor laid in his kitchen/conservatory on top of electric underfloor heating or UFH as its commonly known. Although the Limestone looked great the tiler had not laid the tiles very level and there were many tiles with 2 to 5 mm lippage between them. Not only was this unsightly it also created a tripping hazard. It was unacceptable to the client and they were very disappointed with the new floor.

Uneven limestone tiled floor Wickham before levelling

Wickham is a small village close to Fareham and actually only ten miles from our base in Portsmouth, so it wasn’t long before I was able to head over and survey the floor and come up with solutions.

As I saw it, we had three options,

  1. Live with it as is.
  2. Rip it all up and damage the electric underfloor heating matt, which would then also need replacing.
  3. Mill the stone with abrasive pads to grind down the lippage.

We discussed all three options and the cost implications; they really were not happy to live with it so that option was out and taking the floor up was going to cause huge disruption and cost. He chose wisely and went for option 3! We confirmed the price and arranged a time to return to carry out the work.

Uneven limestone tiled floor Wickham before levelling

Levelling an Uneven Stone Floor with Milling Pads

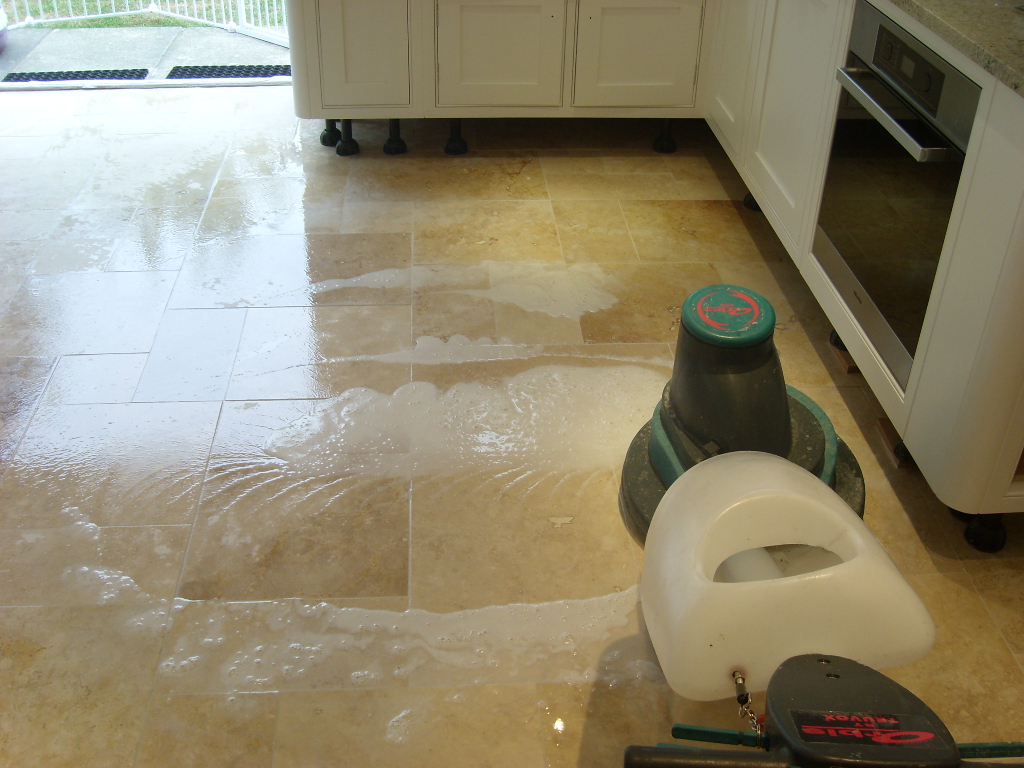
We returned a few weeks later to carry out the work. We used two technicians who very slowly they started grinding the floor level with a heavy rotary machine fitted with milling pads. The pads are applied in sequence with water from 50-grit, 100-grit, 200-grit, 400-grit, 800-grit and then finally 1500-grit. The floor is rinsed with more water in between each pad to remove the fine slurry that is generated. This can be a messy job, but we make use of a wet vacuum to extract the slurry and try hard to keep the dust created to a minimum.

The 50, 100 and 200 grit milling pads are very coarse and grind down the stone flattening the lippage difference between the tiles, the 400, 800 and 1500 grit burnishing pads then refine and hone the stone bringing back its polished appearance. Once we were satisfied that the floor had been milled successfully and the level of the floor was now acceptable, we gave the floor a final rinse and extraction, then left it to dry out.

Sealing a Limestone Tiled Kitchen Floor

After a couple of days, we came back to seal it with Tile Doctor Colour Grow. The floor was checked before sealing with a moisture meter to ensure it was nice and dry. The seal would not cure property otherwise.

Three coats of the Tile Doctor Colour Grow product were applied to the Limestones. This product is an impregnating sealer that works by occupying the pores in the stone thus preventing dirt from becoming ingrained there. Colour Grow enhances the natural colours in the stone and works well on Limestone where it brings out the cream and brown shades and really enhances the appearance of the stone.

Uneven limestone tiled floor Wickham after levelling Uneven limestone tiled floor Wickham after levelling

After completion the floor was completely level and it looked lighter and cleaner. You can see the results in the pictures, the floor was transformed, and the kitchen now looks stunning. The client was ecstatic and recommended Tile Doctor to the shop where he had purchased the stone as they had felt he would never get the finish he had hoped for. He also left the following testimonial on the Tile Doctor feedback system.

We had a new limestone floor installed in a large and difficult area but the result was not satisfactory in that there was too much “lippage” from stone to stone in many parts of the floor. All the advice we received was that it would not be feasible to mill the floor level and that we would either have to live with it or lift and replace it – a terrible prospect. However, Charles persuaded us that it could be done and his team managed to mill it and polish it such that it now looks superb. The process was relatively quick and very clean. The team was thorough, professional and a pleasure to have around. We are delighted with the result and would recommend them strongly for any similar work
Philip G., Wickham


Professional Milling of a Limestone Tiled Kitchen in Hampshire

Levelling an Uneven Limestone Kitchen Floor in Wickham Read More »

Damaged Marble Tiled Kitchen Floor Before After Restoration Winchester

Acid Damaged Marble Kitchen Floor Restored in Winchester

Marble is a natural material which although hard wearing can easily be ruined by a strong chemical such as acid. In this case my client’s kitchen floor which was laid with black Marble square tiles was etched due to the accidental spill of a corrosive agent and the subsequent attempt to clean it up.

Acid Damaged Marble Floor Tiled Kitchen Floor Before Renovation Winchester
The property was in the historic city of Winchester and as you can image my client was horrified by the state of their Marble floor which was now ruined. Desperate for a solution that didn’t involve the expensive tiles being replaced we were asked to take a look.

After surveying the floor, I recommended resurfacing the stone with a set of diamond encrusted floor burnishing pads which would remove the etching and hone the stone back to its original appearance.

Happy to discover there was a solution to the problem we were given instructions to go ahead with the restoration.

Honing Acid Etched Marble Floor Tiles

Our first task was to remove the kickboards from underneath the kitchen units, this ensures they are not scratched during the cleaning process and it also allows our buffer machine to get right to the edge of the floor.

I then started the burnishing process by applying a 400-grit coarse burnishing pad lubricated with a little water to the floor. This coarse pad will remove the etching and dirt from the Marble. It does generate a fine slurry on the floor so after each pad it’s best to rinse the slurry away with water and then extract it off the floor using a wet vacuum.

Following this, I worked my way through the remaining burnishing pads repeating the process with 800-grit medium and 1500-grit fine grit burnishing pads. I also used some small hand-held burnishing blocks in the difficult to reach corners and edges.

The floor pads struggle to reach into the recesses of the grout lines so halfway through the burnishing process I stopped to apply a dilution of Tile Doctor Pro-Clean along the grout lines and give them a scrub with stiff hand brushes repeating the process in stubborn areas.

After a final rinse the floor was left to dry off overnight.

Sealing Black Marble Floor Tiles

The next day I finished the polishing process by applying the last of the four pads in the set which is a very fine 3000-grit pad which refines the polish even further. This last pad is applied dry with only a little water sprayed onto the floor using a technique we call a ‘Spray Burnish”. The one of the advantages of this method is it leaves the floor dry so is ready for sealing.

Now that the appearance of the Marble had been restored it was time to protect the stone against future dirt, stains and damage by applying a sealer. On this occasion I chose Tile Doctor Colour Grow which is a colour enhancing product that really improves the depth of the black Marble tiles and increases the contrast with the white veins in the stone. Two coats of Colour Grow were applied allowing time for each coat to dry in-between coats. Once the sealant had hardened, I ran over the floor with a white buffing pad to further enhance the look of the Marble floor.

The Marble tile and grout was completely transformed much to the relief of the owner.


Marble Kitchen Floor Tiles Restored in Winchester

Acid Damaged Marble Kitchen Floor Restored in Winchester Read More »

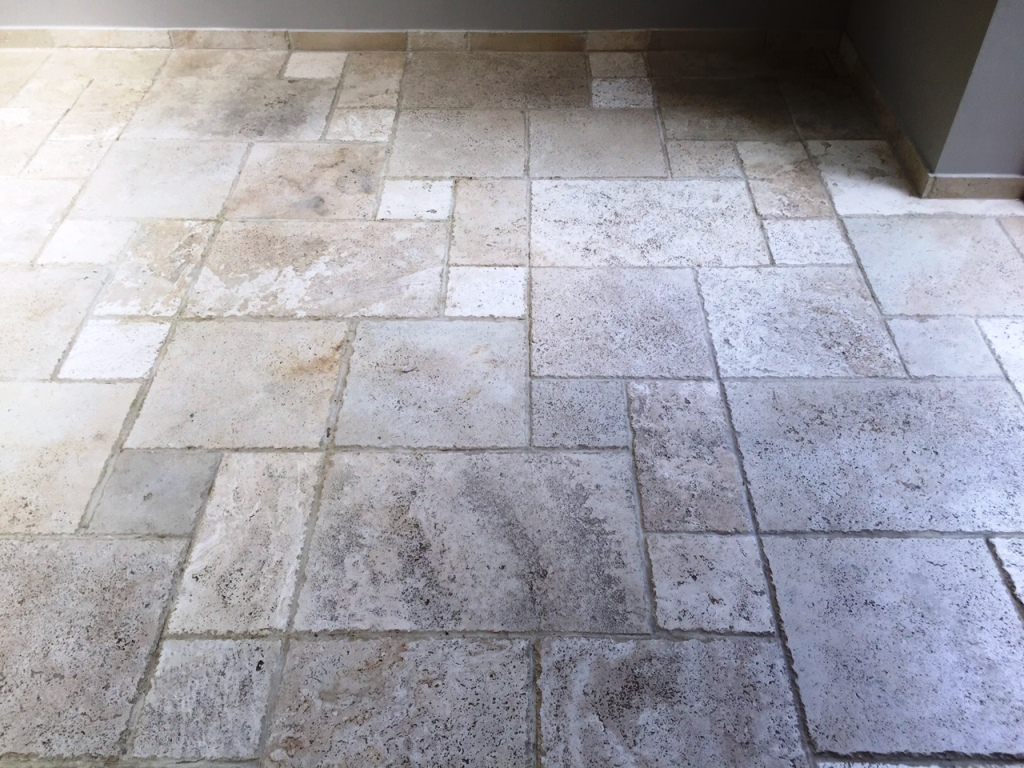
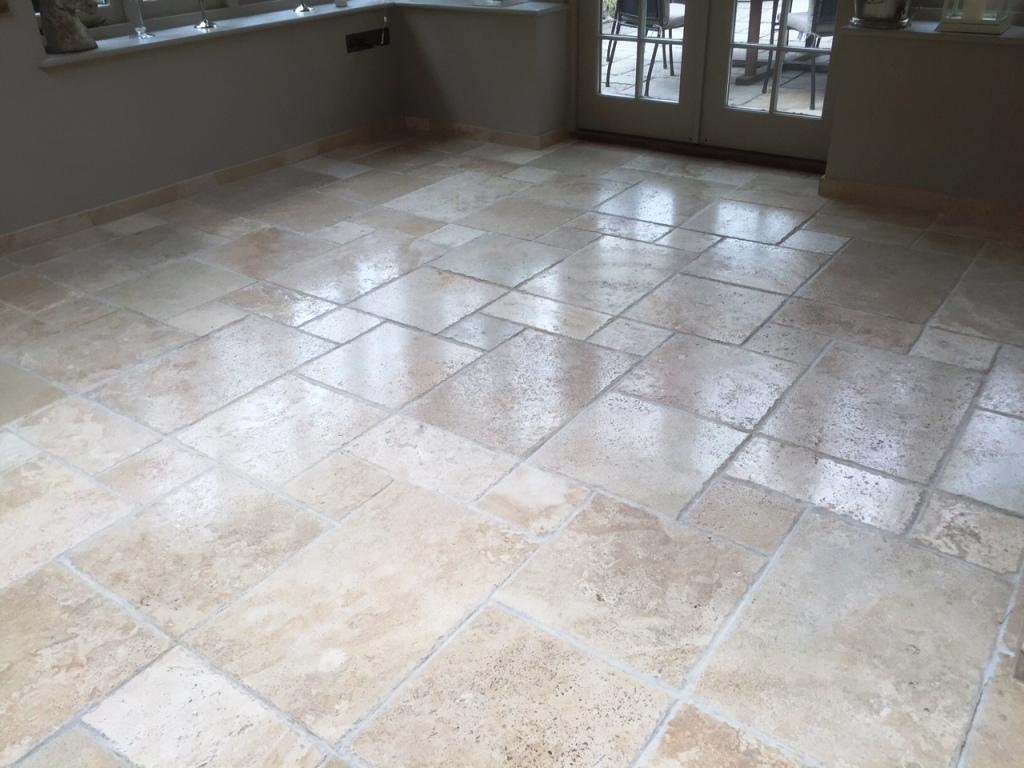
Pitted Travertine Floor Tiles Before and After burnishing in Andover

Pitted Travertine Tiled Floor Rejuvenated in Andover

To restore high quality, polished stone such as Travertine, Marble, and Limestone, we find that the most effective method is to use a process known as burnishing.

It involves the application of specialist diamond encrusted pads of different grits in sequence. The pads with coarser grits grind down out soil buildup, while the subsequent application of finer grit pads gradually hones an aesthetic polish on the surface of the tiles. Tile Doctor’s system consists of four burnishing pads: Coarse, Medium, Fine and Very Fine.

We use burnishing in these types of floor because we find that liquid cleaning products alone do not always achieve the best results. In fact, some household cleaning products can be damaging it not used correctly.

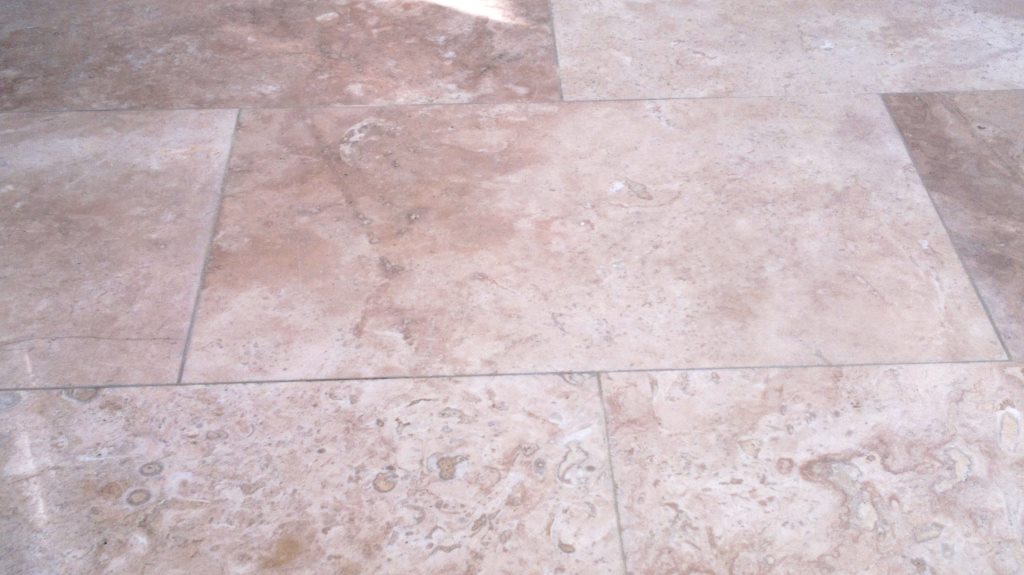
One customer of ours, who lives in Andover which is west of Basingstoke, was having a particularly difficult time keeping her pitted Travertine tiled floor clean, leaving them looking exceptionally dirty and dull and we were asked to restore their appearance.

Pitted travertine floor tiles before cleaning in Andover

Burnishing a Dirty Pitted Travertine Tiled Floor

As mentioned, to restore travertine we find the best method to be burnishing which has the added advantage of tightening up the pores in the stone, creating a natural sheen before any sealer is even applied.

To undertake the burnishing, I used our four pad system, polishing the Travertine with each pad in sequence – starting with the Coarse pad and ending with the Very Fine pad. This achieved a nice, even satin finish, which was ideal because the customer did not want a high shine gloss.

With the stone tiles cleaned and polished, I turned my attention to the grout, which was similarly dirty. To clean this, I opted for a liquid product in the form of Tile Doctor’s high alkaline cleaner, Pro Clean. I applied and scrubbed the product into the grout to eliminate ingrained dirt and stains, before rinsing the whole floor, using a wet-vac machine to remove the dirty cleaning residue, and leaving it to dry.

Sealing a Pitted Travertine Tiles Floor

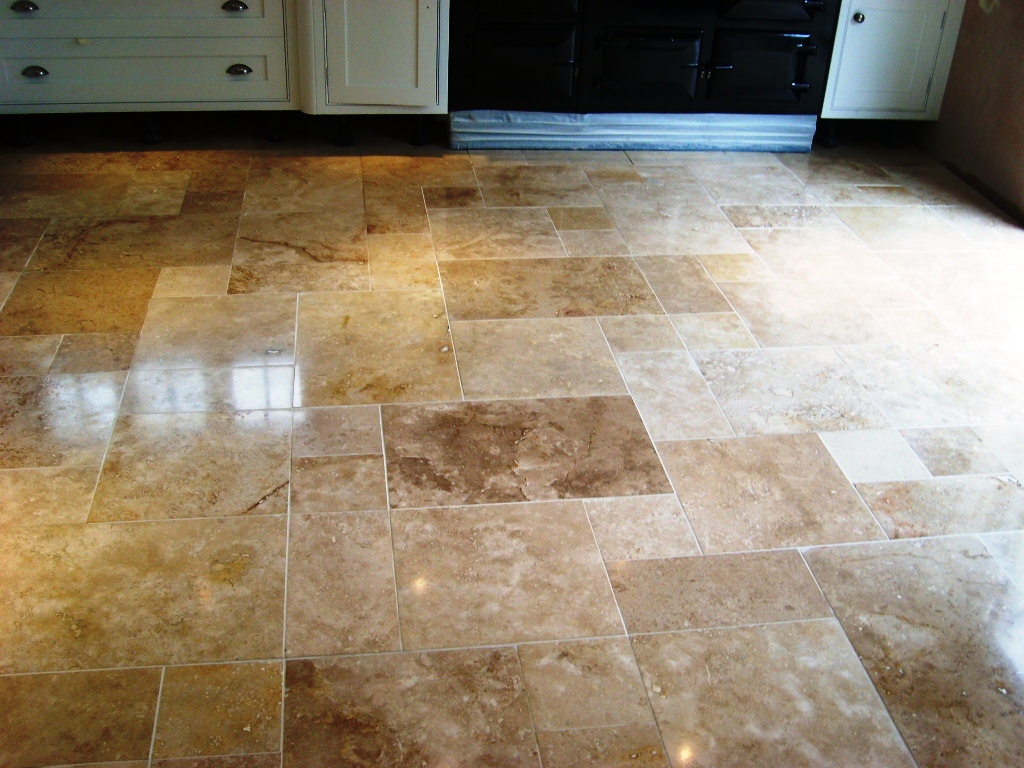
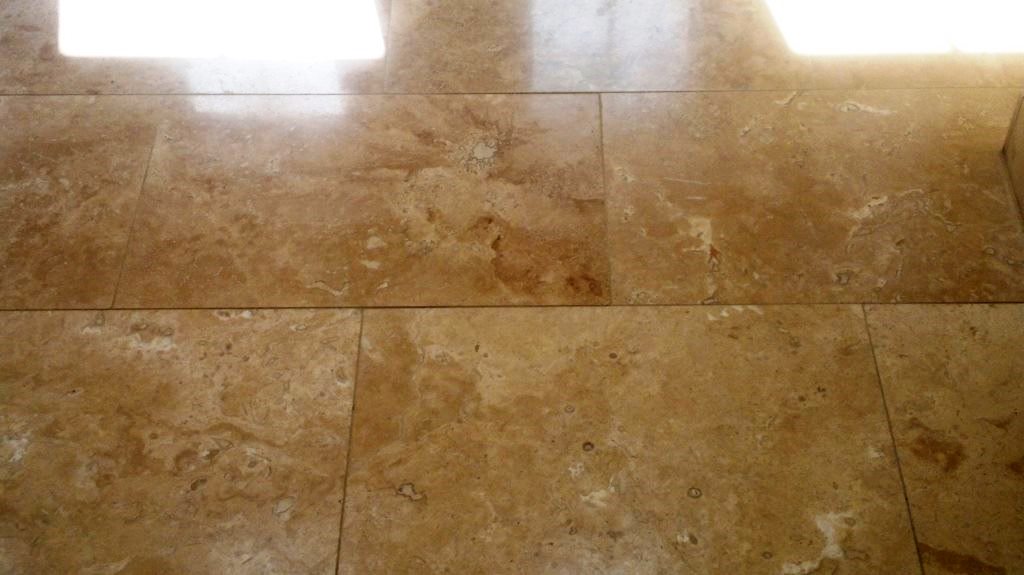
Once the Travertine tiles were dry, I gave them a final polish in preparation for sealing. My choice of sealer was Tile Doctor Colour Grow – our impregnating, colour enhancing sealer for Travertine, Marble and Limestone. As you can see from the photo below, the sealer really lifted the natural shades in the stone. Both myself and the customer were really pleased with the overall result.

Pitted travertine floor tiles after burnishing in Andover
A bottle of Tile Doctor Stone Soap was left with my very happy customer along with instructions for aftercare. We recommend Stone Soap for the regular cleaning of polished Travertine as it enhances the natural patina in polished stone.

Cleaning and Polishing Travertine Floor Tiles in Hampshire

Pitted Travertine Tiled Floor Rejuvenated in Andover Read More »

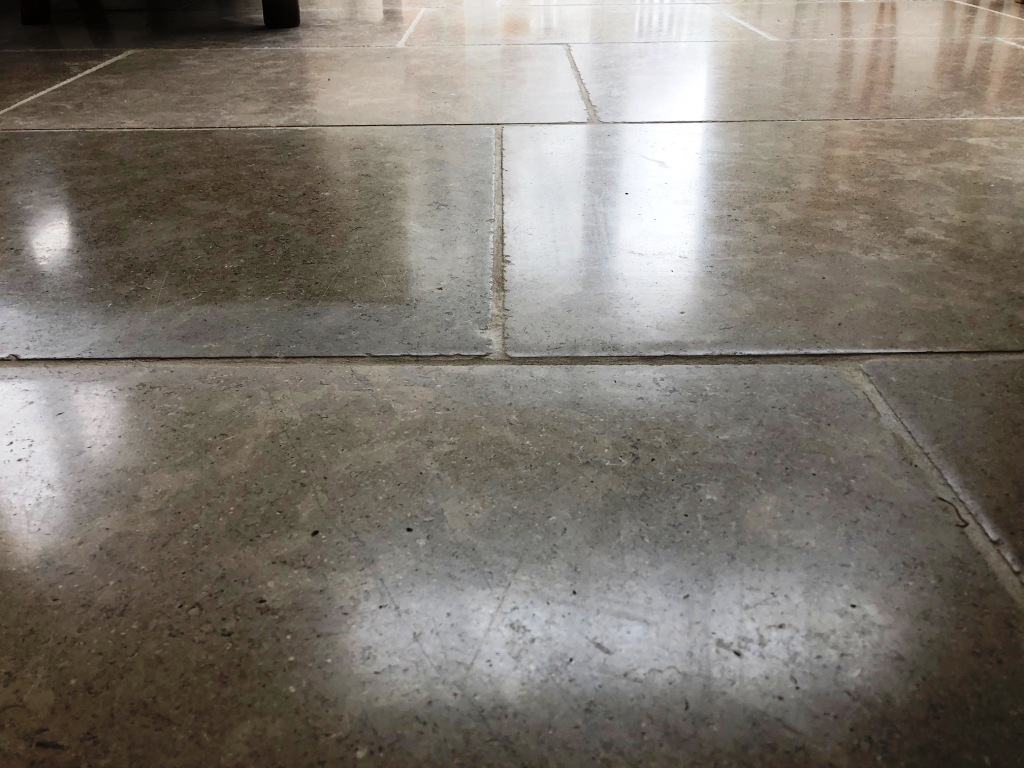
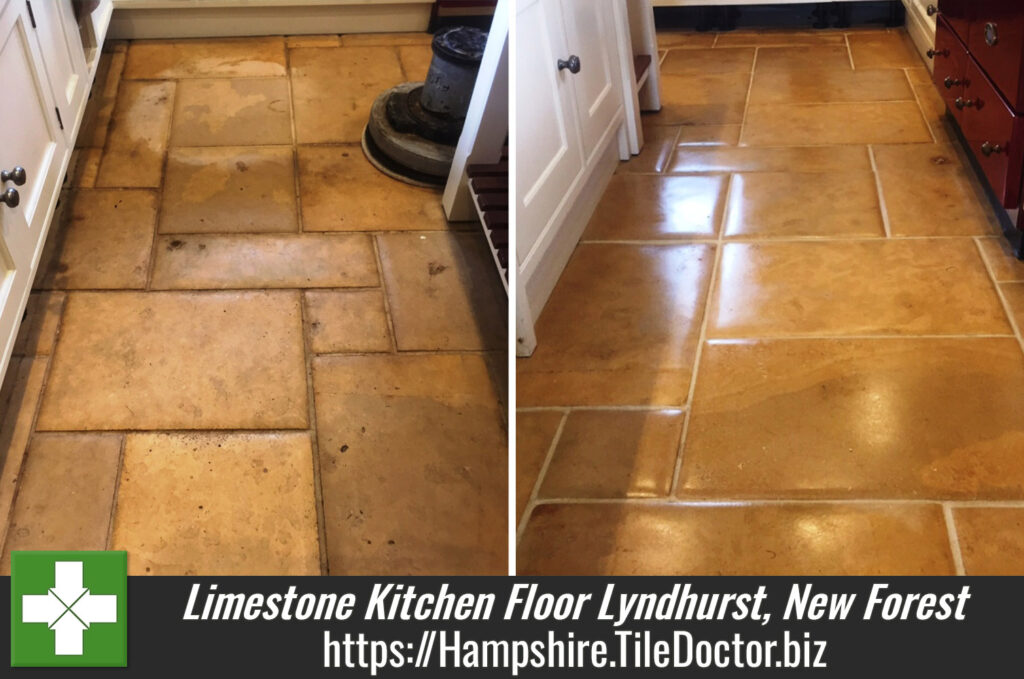
Limestone floor during cleaning Lyndhurst New Forest

Limestone Kitchen Floor Polished in Lyndhurst, New Forest

Limestone is a beautiful flooring material however it’s a porous sedimentary rock which is not as tough as its cousins, Marble and Travertine, and therefore will need more Maintenance over time. This Limestone tiled kitchen floor in Lyndhurst is a great example of how this material can lose its appearance without a regular maintenance regime in place.

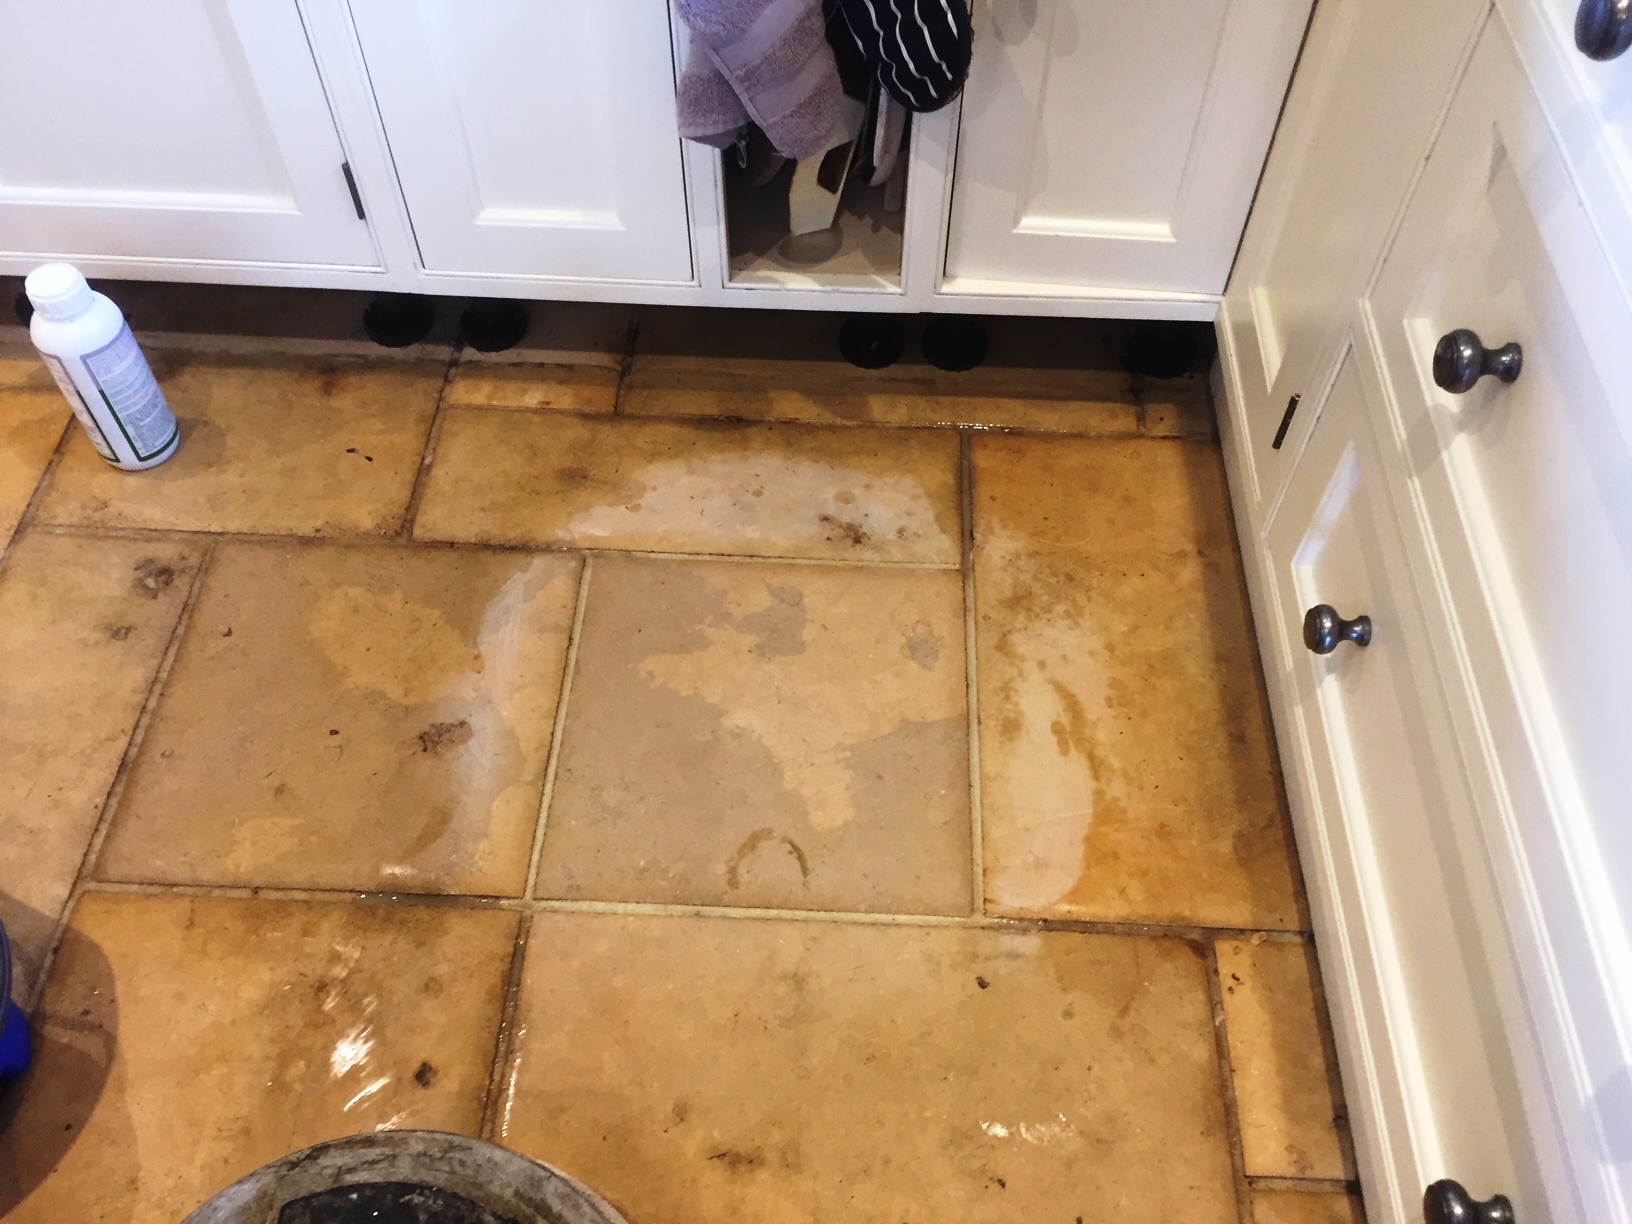
Limestone floor before cleaning Lyndhurst New Forest Limestone floor during cleaning Lyndhurst New Forest

Cleaning Limestone Kitchen Tiles

To restore the appearance of polished Limestone we use a set of diamond encrusted Burnishing Pads which effectively cut back the layer of dirt on the floor and then build back up the polish. It was a reasonably large kitchen with an island worktop to so we worked in sections removing the kick boards as we went.

You can see the effectiveness of the process from the test patch below.

Limestone floor before cleaning Lyndhurst New Forest

We stated the burnishing process with the coarse pad fitted to a rotary machine and applied with a little water. The coarse pad is very good at removing dirt and old sealers from stone and once completed the resultant surface water and loose dirt is removed using a wet vacuum.

At this point the grout was also cleaned by applying a strong solution of Tile Doctor Pro-Clean which was scrubbed in along the grout lines, this is necessary as the recessed nature of the grout makes it difficult for the pads to reach it.

Limestone floor during cleaning Lyndhurst New Forest

I mentioned earlier there are four pads in the burnishing system, so once the floor was rinsed with water following the grout cleaning the other three pads were applied to the stone floor in sequence finishing on the finer polishing pads one after the other until we were left with a high shine finish.

Sealing Limestone Tiled Floor

We left the floor to dry and came back later to seal the floor, the floor must be dry before sealing otherwise it can effect the performance of the sealer. Once we were happy the floor was dry we proceeded to seal the Limestone tile using two coats of Tile Doctor Colour Grow which is a colour enhancing product that impregnates the pores of the stone bringing out the natural colours and protecting it from within.

Limestone floor after polishing Lyndhurst New Forest Limestone floor after polishing Lyndhurst New Forest


Maintaining Limestone Floor Tiles in the Hampshire New Forest

Limestone Kitchen Floor Polished in Lyndhurst, New Forest Read More »

Limescale Removal Basingstoke Shower Cubicle Before and After

Limescale Removed From Ceramic Tiles in Basingstoke Shower Cubicle

The photographs below are taken from a house in the old market town of Basingstoke which is now the largest town in Hampshire. I was asked to address a very severe case of Limescale build-up in a shower cubicle. The wall tiles were Ceramic and a shocking amount of Limescale had deposited itself on them and the shower tray over the years; the owners were going to have to replace everything if Tile Doctor could not come to the rescue!

The photos below really demonstrate the extent of the problem and needless to say the Gauntlet had been laid down and I was ready for a challenge!

Limescale Removal Basingstoke Shower Cubicle Before Limescale Removal Basingstoke Shower Cubicle Before

Cleaning a Ceramic tiled shower cubicle

My first task was to provide the Ceramic tiled walls with an initial clean. I did this by firstly mixing a diluted solution of the high alkaline cleaner known as Tile Doctor Pro Clean and then applying this on the tiles and leaving it to dwell for a while before scrubbing it in by hand in order to remove any surface dirt and scum. This was then washed off and I set my mind to the main task at hand: the Limescale removal.

Removing Limescale from a Ceramic Tiled Shower Cubicle

To remove the Limescale it is necessary to apply an acidic product. However, there is an issue for homeowners that most products readily available on the market come in a liquid form, which of course simply drips down the tile, and therefore does not work to the best of its abilities. Fortunately, Tile Doctor recently launched a new product by the name of Acid Gel. Since it’s in a gel form it stays put on the surface and does not evaporate or dry out too quickly. This allows it time to break down the Limescale and other difficult stains.

Acid Gel was thus applied to the affected areas and left to dwell for a short while. I then scrubbed it deeply into the tile and grout lines, and follow up with an application of steam to tackle the stubborn areas and help the Acid Gel to tackle the Limescale.

Limescale Removal Basingstoke Shower Cubicle After Limescale Removal Basingstoke Shower Cubicle After

The results were absolutely fantastic, and even the shower tray – which was in a very poor state indeed – came up very clean. Needless to say, my client was very pleased that they now do not have to replace the shower!

Dealing with Limescale Build-up in Hampshire

Limescale Removed From Ceramic Tiles in Basingstoke Shower Cubicle Read More »

Terracotta Floor With Efflorescence in Lymington Before and After

Removing Efflorescence From a Terracotta Tiled Floor in Lymington

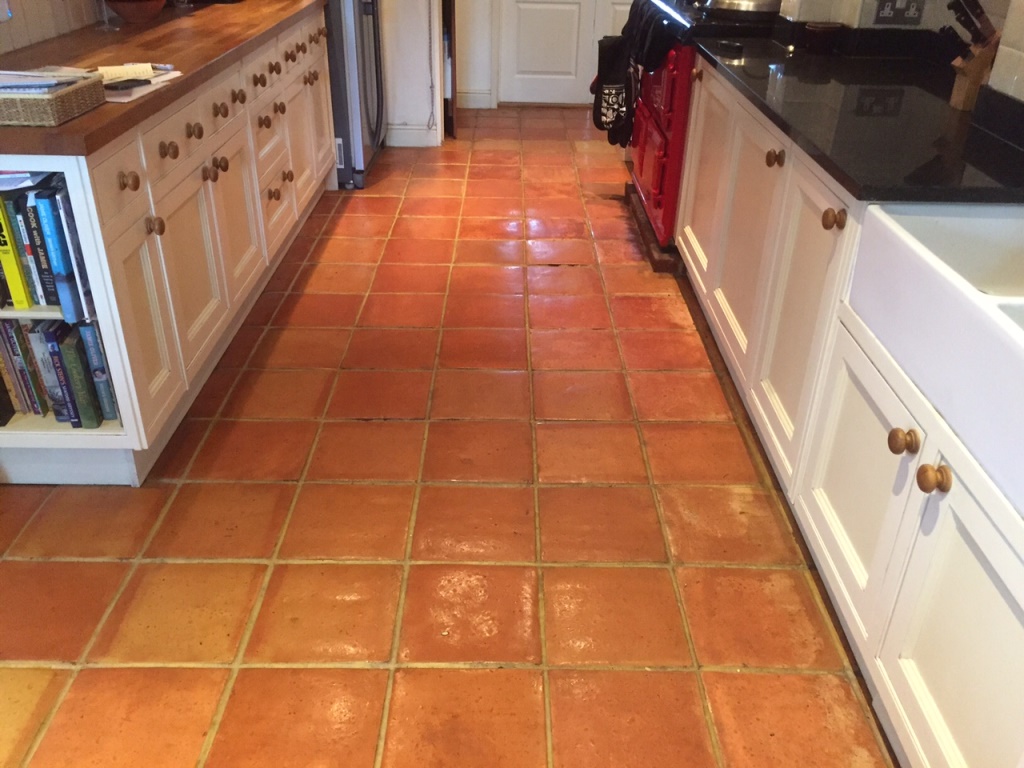
Here’s an interesting job I completed recently in the town of Lymington which is a lovely costal town within the New Forest and on the west side of the Solent. This Terracotta tiled floor was installed in the kitchen and was suffering from an efflorescence issue due to an ongoing leak which resulted in the salts in the water becoming deposited on the surface of the tiles as the water evaporated leaving a white bloom on the surface.

Terracotta Floor With Efflorescence in Lymington Before
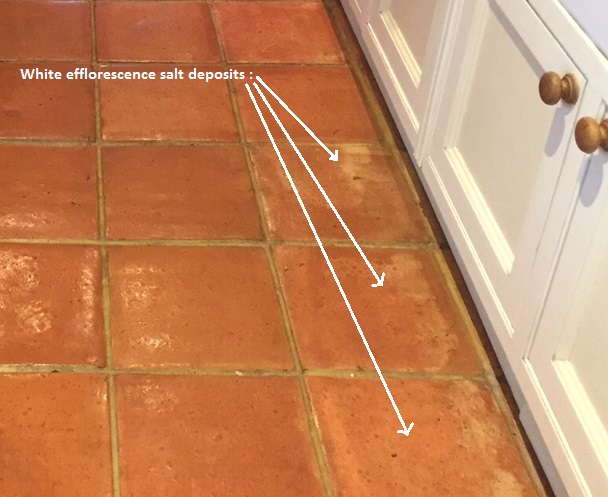
This process is more commonly known as efflorescence and is particularly common in old properties which have no damp proof membrane under the floor and white staining by the cupboards is especially visible in the below photograph.

Terracotta Floor With Efflorescence in Lymington Before Enlarged
My client was eager to have the problem fixed, and so enlisted Tile Doctor to get the job done.

Removing Efflorescence from Terracotta

To remove the efflorescence, the Terracotta tiled floor was acid washed using a mild dilution of Tile Doctor Grout Clean-Up which is primarily sold to remove grout smears but is equally effective at removing mineral deposits such as the white salts left behind by efflorescence.

The solution was scrubbed into the tiles using a stiff scrubbing brush and was successful at removing the white staining. Naturally it’s not advised to leave acid too long on any surface so the floor was treated in sections and then rinsed off with water and the residue removed using a wet-vacuum.

Following this, the floor was power-scrubbed in combination with a diluted solution of Tile Doctor Pro-Clean. Pro-Clean is a versatile cleaner that also contains stripping properties, allowing it to break down and remove old sealers, it also does a nice job getting the grout clean.

With the efflorescence treated and the floor now clean I was now happy with the condition of the tiles and give them a final rinse under pressure to ensure the floor was neutralised and any trace of products removed.

Sealing a Terracotta tiled floor

The Terracotta tiled floor was then left to dry overnight and I came back to seal the floor the next day. To seal the tiles I used three coats of Tile Doctor Seal & Go Extra, which provides a robust surface seal, and is recommended for internal floors with the damp issues.

Terracotta Floor With Efflorescence in Lymington After
Hopefully this quick report has offered some useful advice on how to treat efflorescence which is quite a common problem; naturally if you have further questions Tile Doctor does offer a free advice service so do get in touch.

Treating Efflorescence on a Terracotta tiled floor in Hampshire

Removing Efflorescence From a Terracotta Tiled Floor in Lymington Read More »

Travetine Tiles in Fareham Before and After Polishing

Travertine Tiled Floor Maintenance in Fareham

Travertine is a beautiful natural material which due to its hardness makes a fantastic flooring material. To get the best out of it though it does need to be polished as it does dull over time depending of the amount of wear it receives. I also recommend sealing it as well as this will protect the stone from staining and if you have the right sealer it can enhance the look of the stone even further.

Travetine Tiles in Fareham Before Cleaning

Cleaning Travertine Kitchen Tiles

This Travertine tiled floor in Fareham was due a polish so I gave the floor a quick clean using Tile Doctor Pro-Clean paying particular attention to the grout with a stiff grout brush. The dirty solution was then removed using a wet vacuum and I moved onto burnishing the Travertine to bring up the polish.

Burnishing requires a set of four diamond encrusted pads with different grits from coarse to extra fine and are applied to the floor using a little water to help lubricate the process. It’s also necessary to rinse the floor between each pad to remove the slurry that is generated in the process. Burnishing took most of the day so once finished I give the floor a final rinse and left it to dry off overnight.

Sealing Travertine Tiled Floor

I came back to seal the floor the next day using two coats of Tile Doctor Colour Grow which is an impregnating sealer that soaks into the pores of the stone providing protection from within the stone and also enhancing the natural colours of the stone.

Travetine Tiles in Fareham After Cleaning
On reflection I can see I probably should of taken more photographs of this floor, hopefully you can appreciate the difference which was quite remarkable.

Polishing a Travertine Floor in Hampshire

Travertine Tiled Floor Maintenance in Fareham Read More »

Marble Tiled Floor Petersfield Before and After

Cleaning & Polishing Marble Floor Tiles in Petersfield

This polished Marble tiled floor was installed in a house in the old market town of Petersfield. The tile and grout was in good condition but like all polished stone floors they will go dull after a period of time and require burnishing and polishing to restore shine.

Marble Tiled Floor Petersfield Begin Marble Tiled Floor Petersfield Begin

Cleaning Marble Floor Tiles

We gave the floor a quick sweep and wash down with a dilution of Tile Doctor Pro-Clean partly to ensure any surface grit etc. was removed but also so we could get a stiff grout brush in along the grout lines and give them a clean. Once done the floor was rinsed down with water which was removed with a wet vacuum, once done we moved straight onto burnishing the floor to restore the polish. Burnishing requires the application of a little water so there was no need to wait for it to dry.

Burnishing requires the application of four different diamond encrusted graded pads in sequence working from coarse which removed old sealers and dirt through to medium, fine and super fine pads which build up the polish on the floor. The floor requires a rinse in-between each pad to remove any slurry and water is extracted from the floor using the wet vacuum, after the super fine pad we removed as much water from the floor as possible and left it to dry overnight ready for sealing the next day.

Sealing Marble Floor Tiles

On our return the next day we made sure the floor was dry with the use of a damp meter and once we were happy we sealed the Marble tiles using two coats of Tile Doctor Colour Grow which is an impregnating sealer the occupied the pores in the tile to prevent other contaminates soaking into the tile. It also does a nice job of lifting the natural colours in the stone and enhancing the look of the tile.

Marble Tiled Floor Petersfield Finished Marble Tiled Floor Petersfield Finished


Polishing Marble Floor Tiles in Hampshire

Cleaning & Polishing Marble Floor Tiles in Petersfield Read More »

Milled Sandstone Finished

Milled Sandstone floor maintained in Warsash

This Milled Sandstone tiled floor was installed in the kitchen of a house in the village of Warsash on the south coast. The floor was looking washed out and lost most of its colour and the owner wanted it looking its best.

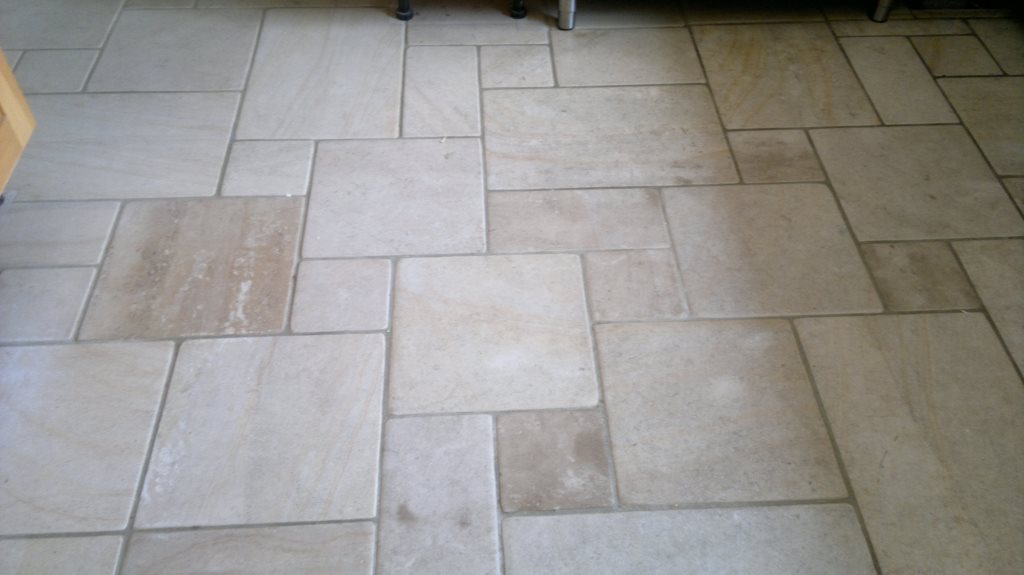
Milled Sandstone 26 Begin Warsash

Cleaning a Sandstone Tiled Floor

The first job was to remove the kick boards from around base of the kitchen units a followed by the application of Tile Doctor Pro-Clean diluted with 10 parts warm water. This was left to soak into the stone and then worked in using a black scrubbing pad. This action gave the floor a good clean and the now dirty cleaning solution was removed using a wet vacuum, the floor was rinsed down with water and the process repeated in the areas where further attention was required until we were happy the tiles were clean. The final cleaning action was to wash down the tiles with clean water a final time to remove any cleaning product and neutralise the floor before the next step of sealing. The wet vacuum was used again to remove as much water from the floor as possible and we then left for the evening so the floor could fully dry overnight.

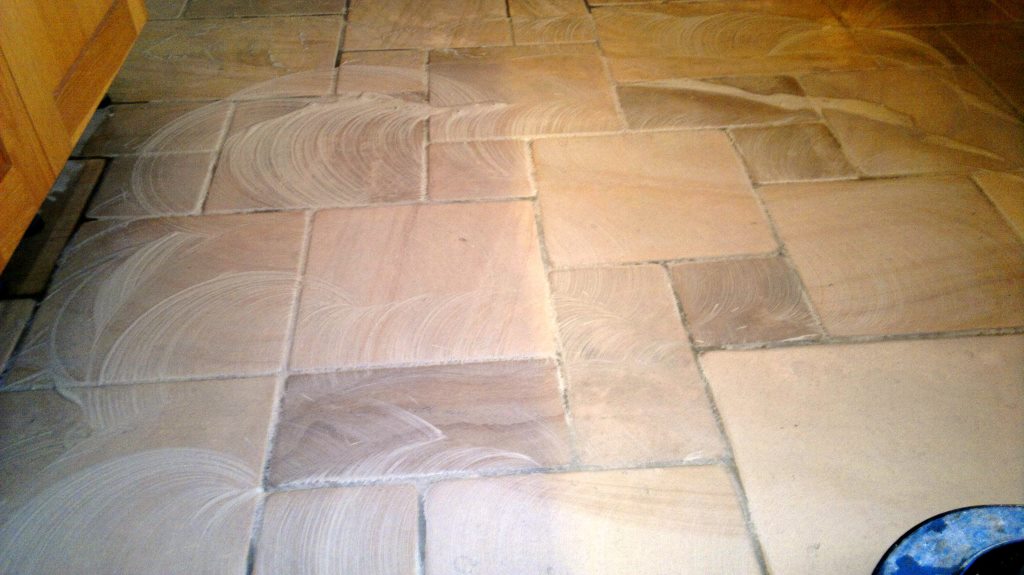
Milled Sandstone 26 Cleaning

Sealing a Sandstone Tiled Floor

We came back the next day and tested the floor with a damp meter in a few different locations to make sure no dampness remained in the stone. The sandstone was dry so we proceeded to seal the floor with Tile Doctor Colour Grow which is an impregnating sealer that occupies the pores in the stone preventing dirt from becoming ingrained there, it also as its name suggests brings out the colour in the stone and it certainly worked well on this floor and brought out the brown colours of the Sandstone, two coats were sufficient.

Milled Sandstone 26 Finished
 

Milled Sandstone Floor Cleaned and Sealed in Hampshire

Milled Sandstone floor maintained in Warsash Read More »

Cleaning Porcelain Tile and Grout in Warsash Before and After

Cleaning Micro Porous Porcelain Tiles and Grout in a Warsash Kitchen

Porcelain tiles are very tough and a great choice for kitchens where they are likely to see a large amount of foot traffic, you do need to be careful however if they are the micro porous porcelain which as the name suggests are slightly porous and if not sealed will trap dirt. The other problem you are likely to have with any tiled floor is the grout which has a porous top layer that can become stained. This kitchen floor at a house in Warsash had both these issues and needed to be cleaned and re-sealed due to dirt becoming ingrained in the tile and grout making it difficult to clean and losing its appearance.

Cleaning Porcelain Tile and Grout in Warsash Before

Cleaning and Preparing Porcelain Tile and Grout

To remove any remaining sealer and clean the tiles and grout a strong dilution of Tile Doctor Pro-Clean was applied and left to soak in to the surface for around ten minutes before scrubbing it into the tile with a rotary machine fitted with a black scrubbing pad and also a stiff hand brush along the grout lines. This was then washed down with warm water all of which was removed by a wet Vacuum. This stripping and cleaning process was repeated until the tile and the grout was looking new again after which the floor was given a thorough rinse in order to remove any trace of product and then dried as much as possible using the wet vacuum.

Sealing Micro Porous Porcelain

We left the floor to dry overnight and came back the next day to seal the floor first testing to ensure it was bone dry. Dry it was and so we proceeded to seal the floor using two coats of Tile Doctor Colour Grow which provides strong stain protection as well as lifting the colours in the tile. For those technically minded people reading this post an impregnating sealer penetrates into the pores of the tile to occupy the holes and therefore prevent any dirt from resting there.

Cleaning Porcelain Tile and Grout in Warsash After
I took the picture above whilst the floor was drying but hopefully you can see the improvement in the look of the tile and how clean the grout has become.

Restoring Porcelain Tiles and Grout in Warsash

Cleaning Micro Porous Porcelain Tiles and Grout in a Warsash Kitchen Read More »

Polished Travertine Lymington Before and After Cleaning and Polishing

Cleaning & Polishing Travertine Floor Tiles in Lymington

The photographs below are from a house in Lymington where the Travertine Tiled floor had become dull and were now in need of a re-polish. It’s a fact that depending on the amount of foot traffic they receive all polished stone floors will lose their shine over time and require a re-polish.

Polished Travertine Lymington Before Cleaining

Cleaning Travertine Floor Tiles

To get the shine back on the floor we use a process called burnishing which is done using a set of four diamond encrusted pads, each one has a different grade from coarse through to super fine.

We gave the floor a quick sweep and wash down first to ensure any surface grit and other detritus was removed and then stated the burnishing process with the coarse pad fitted to a rotary machine with a little water. The burnishing pads are very good at removing dirt and sealers from hard stone including Marble; the surface water and loose dirt was removed used a wet Vacuum. And the process was repeated using the Medium and Fine pads. Before moving onto the superfine polishing pad we gave the grout a good scrub using Tile Doctor Pro-Clean worked in using a stiff grout brush. The final Super Fine polishing pad was then applied and the floor given another wash down to ensure any dirt had been removed, the water being extracted from the floor using the wet vacuum.

Sealing Travertine Floor Tiles

The floor was still quite wet at this point so rather than sealing the floor we left it to dry naturally and came back the next day to seal it. It’s important the floor is dry before sealing so we test first using a damp meter in several locations to be sure. Once we were happy the floor was dry we proceeded to seal the Travertine tiles using two coats of Tile Doctor Ultra Seal which is a natural look sealer that doesn’t alter the look of the tiles but provides the necessary surface protection by filling the pores in the tile so dirt cannot penetrate.

Polished Travertine Lymington After Cleaining and Polishing
 

Travertine Floor Tiles Maintenance in Lymington

Cleaning & Polishing Travertine Floor Tiles in Lymington Read More »

Cleaning Travertine Floor Tiles in Havant Finsished

Cleaning & Sealing Travertine Floor Tiles in Havant

Travertine floor tiles look amazing when they have just been installed but after a few years the polish wears down, dirt starts to become ingrained in the stone and they start to lose their appearance. They do need regular maintenance and potentially re-polishing and these tiles installed in kitchen in Havant were no different.

Cleaning Travertine Floor Tiles in Havant Before

Cleaning Travertine Kitchen Tiles

First job was to remove the kickboards under the kitchen units and cover the free standing fridge with a wrap of plastic, this is a necessary precaution to stop fluids soaking into the wooden kicker boards and splashing the fridge. A dilution of Tile Doctor Pro-Clean was applied to the floor with a mop and left to soak in for around fifteen minutes. The grout lines were then given a good scrub and we ran a scrubbing pad fitted to a rotary machine over the tiled floor to give it a good clean and remove any lose debris.

Cleaning Travertine Floor Tiles in Havant During
To restore the polished appearance of the Travertine it was burnished using a set of diamond encrusted pads which come in four grades and are applied to the stone floor with a little water in sequence from Coarse through to finally Super Fine which provides the final polish leaving a high shine finish.

Sealing Travertine Tiled Floor

The floor was given another wash and left to dry off overnight and we came back the next day to seal it. We check the floor was dry first and then proceeded to seal the Travertine tiles using two coats of Tile Doctor Colour Grow which really enhances the colours in natural stone as well providing excellent stain protection.

Cleaning Travertine Floor Tiles in Havant Finished Cleaning Travertine Floor Tiles in Havant Finished

I think you will agree from the photographs above that the Travertine tiles looks so much better and the natural brown and gold colours in the stone have really come through.

Travertine Floor Tiles Cleaning and Sealing in Hampshire

Cleaning & Sealing Travertine Floor Tiles in Havant Read More »

Romsey Ceramic Tile and Grout Before and After Cleaning and Colouring

Kitchen Ceramic Tile and Grout Clean in Romsey

This was a straightforward request to deep clean the Ceramic Tile and Grout in the kitchen of a house in Romsey, Hampshire but as you will see from the photograph below the Grout was far too stained to be cleaned effectively. Kitchen grout gets a lot of abuse from spillages so this is not unusual and to prevent it the grout can be sealed or you can choose a dark grout colour.

Romsey Ceramic Tile and Grout Before Cleaning

Cleaning and Preparing the Tile and Grout

To get the tile and grout clean I applied a dilution of Tile Doctor Pro-Clean and left it to soak in to the surface dirt for a while before scrubbing it with a rotary machine fitted with a black scrubbing pad and also a stiff hand brush along the grout lines. This was then washed down with warm water all of which was removed by a wet Vacuum. This cleaning process was repeated until the tiles were clean and the grout was a good as I could get it. Unfortunately the grout had stained quite badly and we were unable to get a good uniform appearance so after discussing this with the customer it was agreed that we would apply a white Grout Colourant.

Applying Grout Colourant

If it was a small area I could have considered using a Grout Pen however this required more than a touch up so this is where you need an epoxy grout colourant which forms a hard wearing epoxy barrier over the existing grout that looks natural and effectively protects the grout from further staining.

The grout needs to be clean and dry before you apply it so if you’re doing this from scratch make sure you clean the grout first with Pro-Clean or the Pre-Treater product that is available. The grout colourant is then easily applied using a toothbrush, it sounds easy but you have to be very methodical. The colourant dries in about an hour after which it’s worth double checking your work and then removing any excess by applying a little water and running over it with a white pad.

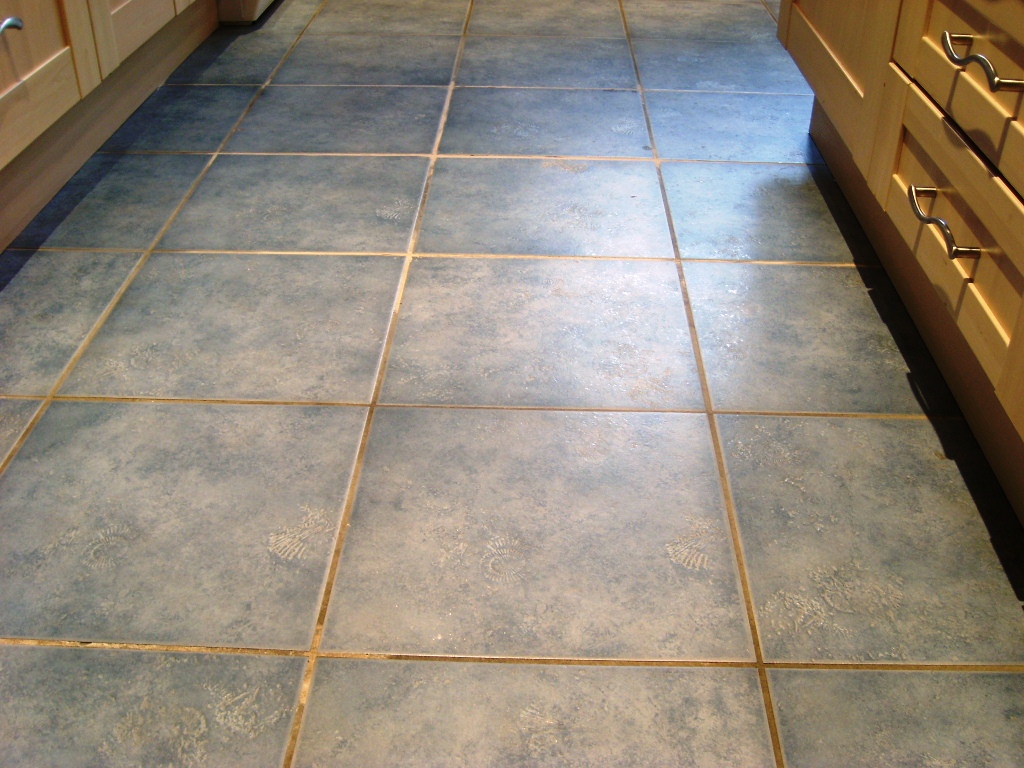
Romsey Ceramic Tile and Grout After Cleaning and Colouring
I think you will agree from the photographs the tiles look much cleaner and the floor transformed by the improvement in grout colour.

Kitchen Ceramic Floor Restored in Romsey

Kitchen Ceramic Tile and Grout Clean in Romsey Read More »

Slate Tile Cleaining Floor Bognor Regis Finish

Cleaning Slate Tiles in Bognor Regis

These slate tiles were installed in the back kitchen of a house in the seaside resort town of Bognor Regis, they were in good physical condition but unfortunately any sealer had worn off some time ago causing them to lose their appearance and look faded.

Slate Tile Cleaining Floor Bognor Regis Before

Cleaning Slate Tiled Floors

Dirt had become ingrained into the tile so I went straight for a powerful cleaning combination of Tile Doctor Pro-Clean Tile and Grout cleaner mixed 50:50 with NanoTech UltraClean. The UltraClean adds tiny abrasive particles to the Pro-Clean making it a more effective cleaning product. The solution was left to dwell on the floor for a while before being scrubbed into the tiles with a rotary machine fitted with a black scrubbing pad; as usual a stiff hand brush was used along the grout lines to get them clean.

Slate Tile Cleaining Floor Bognor Regis During
The soiled solution was removed using a wet vacuum and floor thoroughly rinsed down with clean water. Pro-Clean works as a stripper as well as a cleaner and so any remaining sealer was also removed in the process.

Sealing Slate Floor Tiles

This process took a day so the floor was left to dry overnight and we came back the next day to seal it with five coats of Tile Doctor Seal and Go which is the ideal sealer for Slate tiles as it provides good stain protection with leaves a nice sheen finish; Seal and Go is also water based so there’s no smell like you get with other sealers.

Slate Tile Cleaining Floor Bognor Regis Finish
The slate tiles now look 100% improved and the sealer should keep them that way for two to three years depending on floor traffic.

Cleaning and Sealing a Slate Kitchen Tiles in Hampshire

Cleaning Slate Tiles in Bognor Regis Read More »

Farnham Travertine Floor Finished

Travertine Tiled Floor Maintenance in Fareham

I do like a beautiful Travertine Tiled floor however they do need regular maintenance to keep them looking good. This travertine floor installed in the kitchen of a house in Fareham was no different as the tiles were looking dull and the grout was tarnishing.

Farnham Travertine Floor 1

Cleaning Travertine Kitchen Tiles

To protect the kitchen units from water a protective tape was applied around the base and once done we gave the tiles a quick clean using Tile Doctor Pro-Clean working it in with a scrubbing pad fitted to a rotary machine and then into the grout lines with a stiff hand brush. The dirty solution was then removed using a wet vacuum and we moved onto burnishing the whole tiled floor.

Farnham Travertine Floor Cleaning in Progress
We stated the burnishing process with a red fitted to a rotary machine with a little water. The burnishing pads are encrusted with diamonds and are very good at removing dirt and sealers from hard stone including Travertine and Marble; the surface water and loose dirt was removed used a wet Vacuum. There are four pads in the burnishing system and they are applied to the stone floor in sequence starting with a course pad with a little water and then moving onto the finer polishing pads one after the other until we were left with a high shine finish.

Farnham Travertine Floor Finished 3

Sealing Travertine Tiled Floor

We left the floor to dry overnight and came back the next day to seal the floor. The floor must be dry before sealing otherwise the results can be unpredictable. Once we were happy the floor was dry we proceeded to seal the Travertine tile using two coats of Tile Doctor Colour Ultra-Seal which provides a natural look to the stone as well providing excellent stain protection. Two coats of sealer were sufficient to seal the floor.

Farnham Travertine Floor Finished 4

Travertine Floor Tiles Cleaning and Sealing in Fareham

Travertine Tiled Floor Maintenance in Fareham Read More »

Marble Floor Tile Restoration Winchester Finished

Marble Tiled Floor Restored in Winchester

Photographs below of a classic black and white Marble floor tile installation at premises in the city of Winchester. As you can see these Marble tiles had seen some traffic and were not in the best of condition following on from some building work that had been going on; fortunately we are quite used to dealing with these problem and have just the right products and equipment to restore them.

Marble Floor Tile Restoration Winchester Before

Marble Tile Cleaning and Polishing

For best results on hard stone surfaces such as Marble we burnish the floor using a set of diamond encrusted polishing pads. You start with a coarse pad which applied with a little water to remove surface dirt and sealers etc. before moving through a set of finer polishing pads until you reach a high shine glossy finish.

Half way through the burnishing process we stopped to apply a dilution of Tile Doctor Pro-Clean along the grout lines and give them a scrub with stiff hand brushes repeating the process in stubborn areas.

Marble Floor Tile Restoration Winchester Finished
After the treatment the floor was washed do to remove any soiled solution before being buffed with a white buffing pad. Any trace of its previous condition was now gone and the floor was uniform in appearance, it took much of the day to do the polishing and a set of four burnishing pads to acquire the right lustre.

Marble Floor Tiles restored in Winchester

Marble Tiled Floor Restored in Winchester Read More »

Terracotta Tiled Floor Before and After Cleaning in Andover

Terracotta Tiled Floor Cleaned and Sealed in Andover, Hampshire

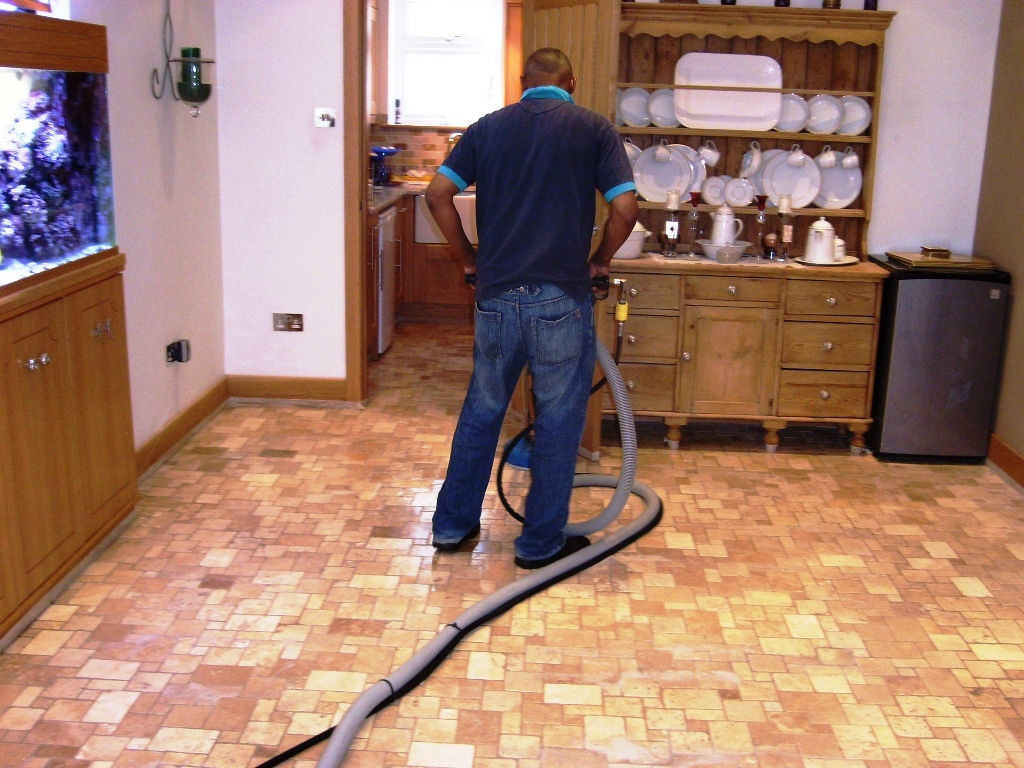
This Terracotta tiled floor was installed in the dining room of a house in Andover and as you can see from the photograph below the floor had not been maintained very consistently and was now well overdue for a complete strip, clean and reseal.

Terracotta Tiled Floor Before Cleaning in Andover

Cleaning Terracotta Tile

To get the floor clean and remove previous sealers and coatings I mixed a strong solution of Tile Doctor Pro-Clean with NanoTech UltraClean which basically adds tiny abrasive particles to a heavy duty alkaline cleaning agent to produce a very effective stripper/cleaner which being alkaline is ideal for cleaning natural products such as Terracotta.

This formula was scrubbed into the tile using a black scrubbing pad fitted to a rotary machine running on a slow speed which helps to reduce splashing; this activity soon brought the dirt off the floor and the soiled cleaning solution was removed using a wet vacuum and the floor was rinsed down with clean water. The cleaning process was repeated a couple of times until we were happy with the floor, a stiff hand brush was then used along the grout lines with more Pro-Clean to clean up the grout. There were a few stubborn paint splashes on the floor and these were removed by spotting the affected area with Remove and Go and a steamer to lift the stain out of the clay.
Once happy the floor was clean it was given a thorough rinse to neutralise it and remove any remaining chemical and left it to dry overnight.

Terracotta Tiled Floor Before Cleaning in Andover

Sealing Terracotta Tile

The next day we came back to seal the Terracotta using numerous coats of Tile Doctor Seal and Go which is an ideal sealer for Terracotta and provides durable stain protection together with a low sheen finish. Terracotta is by its nature very porous and so it’s not unknown for it to take up to nine coats of sealer, which can take some time to apply as like paint you have to wait until it’s dry before you can apply the next coat.

Terracotta Tiled Floor After Cleaning in Andover
 

Terracotta Floor Cleaned and Sealed in Hampshire

Terracotta Tiled Floor Cleaned and Sealed in Andover, Hampshire Read More »
Kitchen Tiled Worktop in Brighton Before and After Cleaning

Cleaning a Ceramic Tiled Kitchen Worktop in Brighton

Following a referral from customer which is always nice to have, we paid a visit to a house in Brighton where the owner was having difficulty keeping their ceramic tiled kitchen worktop clean. As you can see from the photograph below the glazed ceramic tiles were in reasonable condition, it was the grout that was the problem; this is not unusual as glazer ceramics are very hard wearing but the top layer of grout is in fact porous and will trap dirt and become discoloured if not sealed.

Kitchen Tiled Worktop in Brighton Before Cleaning

Grout Cleaning

There were two ways this job could have been tackled, the first being to remove the top layer or grout using the flat blade of a screwdriver and then re-grout. It was a reasonably large area of worktop so this would have taken some time. The second and simpler option is to use a heavy duty tile and grout cleaning product such as Tile Doctor Pro-Clean and that is exactly what we did, it also has the added advantage of cleaning the tiles at the same time.

The Pro-Clean was diluted with water and then left to dwell on the tile and grout for about ten minutes before being scrubbed in by hand with a stiff brush. For the wall tiles the solution was decanted to a spray bottle and sprayed onto the tiles, the combination with air makes it lighter and more able to stick to a vertical surface.

The tiles were then washed down with water and any stubborn areas re-treated with more Pro-Clean and elbow grease, it wasn’t long before the tile and grout was looking like new again.

Sealing Grout

Now glazed Ceramic tiles don’t need to be sealed as the glaze provides an effective barrier however as I mentioned before the top layer of grout is porous and will attract dirt over time and should be sealed, especially considering kitchen worktops are used to prepare food. Tile Doctor have a range of sealing products any of which will seal grout however in this case I used Wall Tile and Grout Sealer which comes in a spray bottle.

Kitchen Tiled Worktop in Brighton After Cleaning

Cleaning Ceramic Worktop Tile and Grout on the South Coast

Cleaning a Ceramic Tiled Kitchen Worktop in Brighton Read More »
Southampton Slate Tiled Floor Before and After Cleaning

Cleaning Slate Tiles in a Southampton Kitchen

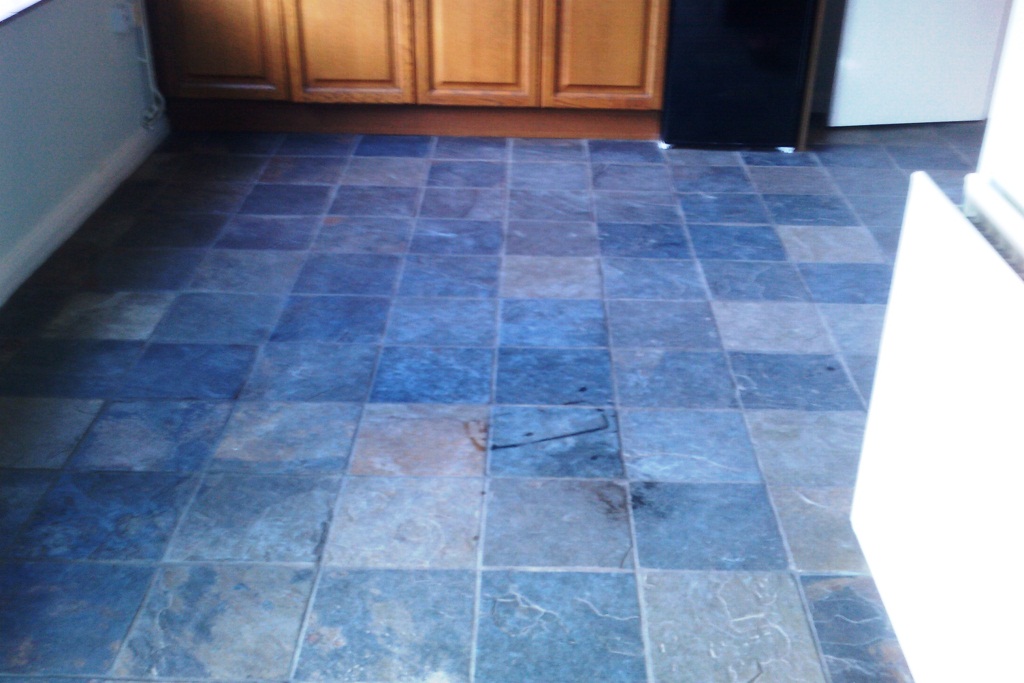
This beautiful slate floor installed in the Kitchen of a house in Southampton had tons of character but unfortunately years of use had left it looking rather washed out and was overdue for a deep clean and re-seal.

Southampton Slate Tiled Floor before Cleaning

Cleaning Slate Tiled Floors

I set about scrubbing the floor using a hot water dilution of Tile Doctor Pro-Clean Tile and Grout cleaner combined 50:50 with NanoTech UltraClean which adds tiny abrasive particles to the solution to make a more effective cleaning product. The solution was left to dwell on the floor for a while before being scrubbed into the tiles with a rotary machine fitted with a black scrubbing pad; a stiff hand brush was used along the grout lines. The soiled solution was removed using a wet vacuum and floor thoroughly rinsed down with clean water. Pro-Clean works as a stripper as well as a cleaner and so any remaining sealer was also removed using this process, had that been a problem I would of resorted to Tile Doctor Remove and Go which is a much stronger coatings remover.

The soiled cleaning solution was removed using a wet vacuum and this was followed by washing down the area thoroughly with clean water; any stubborn marks were revisited with a repeat of the same process until we were happy the tiles were clean.

Sealing Black Slate Floor Tiles

This process took most of the day so we left the floor to dry overnight and came back the next day to seal it using Tile Doctor Seal and Go, a highly recommended sealer for Slate which provides good stain protection with a low sheen finish, slate is quite porous and it took five coats before it was fully sealed.

Southampton Slate Tiled Floor after Cleaning
I think you will agree the floor is transformed, the natural colours of the slate have come through and the low sheen has given the floor a nice health appearance.

Cleaning and Sealing a Slate Kitchen Tiles in Hampshire

Cleaning Slate Tiles in a Southampton Kitchen Read More »

Black Slate Floor Portsmouth Finished

Cleaning Black Slate Tiles in Portsmouth

This was a straightforward black slate tile clean and seal in a large kitchen of a house in Portsmouth, the tile and grout were in good physical condition and just needed of a deep clean.

Black Slate Floor Portsmouth Before Black Slate Floor Portsmouth Before

Cleaning Slate Tiled Floor

The first step was to give the tiles a really good clean using a dilution of Tile Doctor Pro-Clean which was left to dwell on the tile for a while before being scrubbed into the floor using a rotary machine fitted with a black pad. It was a large area so we worked in sections and used a stiff brush along the grout lines to get them clean.

The soiled cleaning solution was removed using a wet vacuum before washing down the area thoroughly with clean water; any stubborn marks were revisited with a repeat of the same process until we were happy the tiles were clean.

Black Slate Floor Portsmouth Cleaning Black Slate Floor Portsmouth Cleaning

Sealing Black Slate Floor Tiles

We left the floor to dry overnight and came back the next day to seal it using Tile Doctor Seal and Go, a highly recommended sealer for Slate which provides good stain protection with a low sheen finish, slate is quite porous and it took five coats before it was fully sealed.

Black Slate Floor Finished Black Slate Floor Finished

The black slate looked amazing when we had finished, the customer was certainly happy with the result.

Cleaning and Sealing a Black Slate Tiled Floor in Hampshire

Cleaning Black Slate Tiles in Portsmouth Read More »

Floor Ceramic Tiles After Stockbridge

Kitchen Ceramic Tile and Grout Clean in Stockbridge

The home owner of this house in Stockbridge had become increasingly unhappy with the state of their ceramic tiled floor and we were asked to come in and give the ceramic tile and grout a thorough deep clean.

Floor Ceramic Tiles Before Stockbridge

Cleaning and Preparing the Tile and Grout

To get the tile and grout clean I applied a dilution of Tile Doctor Pro-Clean and left it to soak in to the surface dirt for a while before scrubbing it with a rotary machine fitted with a black scrubbing pad and also a stiff hand brush along the grout lines. This was then washed down with warm water all of which was removed by a wet Vacuum. This cleaning process was repeated until the tiles were clean and the grout was a good as I could get it. Unfortunately the grout had stained quite badly and we were unable to get a good uniform appearance so it was agreed that we would applying a white Grout Colourant.

Applying Grout Colourant

The grout colourant range sold by Tile Doctor are a huge improvement on those grout pens you will find in DIY stores, they come in a range of colours and form a hard wearing epoxy barrier over the existing grout that looks natural and effectively protects the grout from further staining.

The grout needs to be clean and dry before you apply it so if you’re doing this from scratch make sure you clean the grout first with Pro-Clean or the Pre-Treater product that is available. The grout colourant is then easily applied using a toothbrush, it sounds easy but you have to be very methodical. The colourant dries in about an hour after which it’s worth double checking your work and then removing any excess by applying a little water and running over it with a white pad.

Floor Ceramic Tiles After Stockbridge
I think you will agree from the photographs the tiles look much cleaner and the change in grout colour makes the floor look that much fresher, it will also be a lot easier to maintain going forward.

Maintaining Ceramic Tile and Grout

Kitchen Ceramic Tile and Grout Clean in Stockbridge Read More »
Fareham Terracotta Floor Finished

Terracotta Tiled Floor Maintained in Fareham, Hampshire

This Terracotta tiled floor was installed in the kitchen of a house in Fareham. The floor was in need of a deep clean especially in the high traffic areas where the sealer had worn down and on the tiles near the kitchen units there were some stubborn stains from spillages.

Fareham Terracotta Floor Before

Cleaning Terracotta Tile

I started the job using a solution of Tile Doctor Pro-Clean, which is a heavy duty alkaline product ideal for cleaning natural products such as Terracotta, this was scrubbed in with a black pad fitted to a rotary machine. The cleaning process was repeated a couple of times and a stiff hand brush was used along the grout lines to clean up the grout. To treat the suborn stains we mixed Pro-Clean 50/50 with Tile Doctor NanoTech UltraClean which adds tiny abrasive particles to the cleaner making it even more effective; its best to leave the resultant solution to soak into the tile for half an hour before working it in with a scrubbing brush. Once happy the floor was clean it was given a thorough rinse to remove any remaining chemical and left it to dry overnight.

Fareham Terracotta Floor During

Sealing Terracotta Tile

The next day came back to seal the Terracotta but first checked the floor for any spots we might had missed and also to ensure it had dried sufficiently. Tile Doctor Seal and Go was used to seal the floor, it’s a water based sealer so it doesn’t give off an odour when it’s drying and also offers durable stain protection together with a low sheen finish. Terracotta is very porous and in the end the floor actually took seven coats of sealant before it was fully sealed. Applying a sealer does takes a long time to apply as you have to wait for it to dry before applying the next coat.

Fareham Terracotta Floor Finished
The work took two days in all and you can see the difference for yourself, the Terracotta tile and grout look wonderful and have lifted the overall look of the Kitchen.

Terracotta Floor Cleaned and Sealed in Fareham

Terracotta Tiled Floor Maintained in Fareham, Hampshire Read More »
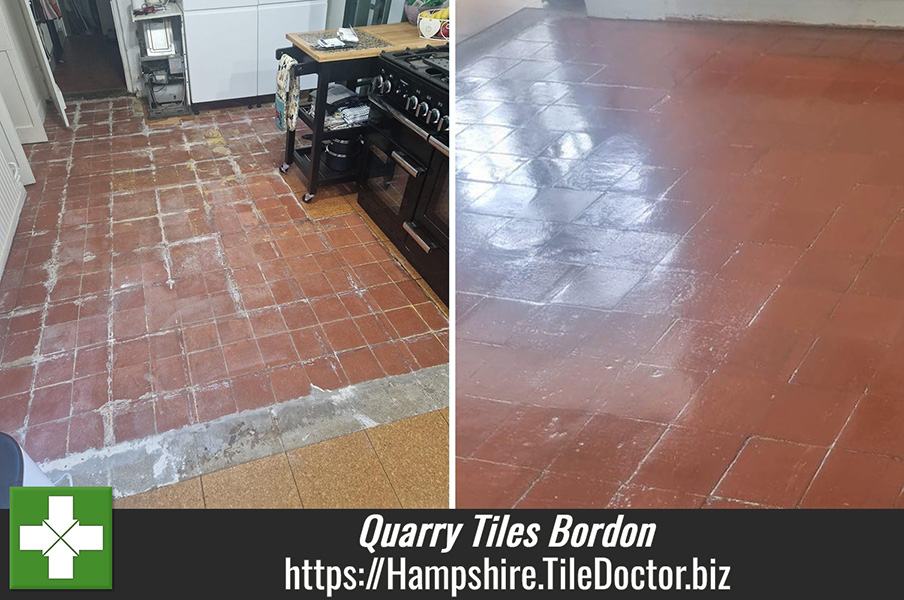
Fareham Quarry Tiled Floor Finished

Quarry Tile Restoration in Fareham

Details below of a Quarry Tiled kitchen floor that were cleaned and sealed for a customer in Fareham. The main problems were that the tiles were becoming increasingly difficult to clean so they looked dull and tired and the grout had become stained.

Cleaning Kitchen Quarry Tiles

A solution of Tile Doctor Pro-Clean was applied to the floor and left to soak for a short while before being scrubbed in with a rotary machine fitted with a black scrubbing pad. The grout was also in need of attention and this had to be scrubbed by hand using a stiff brush along the grout lines, which as you can imagine took some time. The soiled cleaning solution was then removed using a wet vacuum and the floor thoroughly rinsed with water and then left to dry overnight.

Fareham Quarry Tiled Floor Begin Fareham Quarry Tiled Floor Begin

Sealing Kitchen Quarry Tiles

When we returned the next day we could see there were a few areas in need of some further attention so we set about cleaning those up. Once we were happy with the floor and it had managed to dry off we sealed the floor using six coats of Tile Doctor Seal and Go which is a water based sealer (so no smell) that provides surface stain protection to the quarry tile and grout and also leaves a nice deep low sheen on the tile surface.

Fareham Quarry Tiled Floor Finished Fareham Quarry Tiled Floor Finished


Quarry Tile Cleaning in Hampshire

Quarry Tile Restoration in Fareham Read More »

Southampton Slate Floor Before After

Cleaning & Sealing Slate Tiles in Southampton

The owners of this house in Southampton called us in to breathe some life back into their slate floor which had become rather dull and had lost its shine. We took a look and could see the previous sealer had been worn down and it was in need of deep clean and re-seal, sealers will wear off over time and once they are gone dirt will start to get trapped in the pores of the tile.

Southampton Slate Floor Before

Cleaning the Slate Floor

To remove any remaining sealer and give the floor a deep clean we applied a strong dilution of Tile Doctor Pro-Clean. This was left to dwell on the floor for a while before using a rotary machine fitted with a black scrubbing pad to scrub the floor and get the slate floor really clean. The machine can struggle to reach the grout so it was necessary to get in with a stiff hand brush afterwards and scrub along the grout lines. Once I was satisfied with the condition of the stone floor it was given a wash down with clean water which was removed using a wet vacuum to make sure no chemical was left on the floor as this can affect the sealer later.

Sealing the Slate Floor

Sealing the Slate floor was a straight forward process once the floor was clean and free of any debris etc. The sealer chosen for this floor was Tile Doctor Seal and Go which adds a low sheen finish whilst providing stain protection. Five coats were applied using a paint pad applicator before the floor was fully sealed , the number of coats you need depend on the porosity of the stone and each floor is different and you need to let each coat dry before proceeding to the next.

Southampton Slate Floor Finished
 

Cleaning and Sealing a Slate floor in Southampton

Cleaning & Sealing Slate Tiles in Southampton Read More »

Southampton Grout Recolour Before and After

Grout Colouring in Southampton

This Porcelain Terracotta floor had dark grout and the home owner wanted the colour changing to lighten the floor. There are a number of products on the market for this purpose including grout colour pens which are ok for a quick touch up but for a large area like this you really need to use the range recommend by Tile Doctor which not only change the colour but also provides a protective barrier that seals the grout as well ensuring it keeps it appearance well into the future.

Southampton Grout Recolour Before

Preparing the Grout

Before applying a Grout Colour it’s important to ensure the grout is clean of grease and dirt; Tile Doctor Pro-Clean is a strong alkaline cleaner that’s good for this purpose, for best results you should allow the cleaner to dwell for a while and then get into the grout joints by hand with a stiff brush. Last step is to rinse the floor down with clean water to remove any remaining cleaning product, I recommend the use of a wet vacuum at this point to remove liquids from the floor.

Southampton Grout Recolour Before Southampton Grout Recolour After

Applying the Grout Colour

Once the grout has dried you can start applying the colourant which is a relatively straightforward process of squeezing the product onto a toothbrush and running it onto the grout. Don’t be tempted to use an old toothbrush for this purpose as it may contaminate the colourant leading to discolouration in the finish. The product sets in a couple of hours so I was able to do the whole floor in a day.

Southampton Grout Recolour After
 

Colouring Grout in Hampshire

Grout Colouring in Southampton Read More »

Slate Floor Fareham Finished

Cleaning & Sealing Slate Flagstone Tiles in Fareham

These Slate flagstone tile were installed in a conservatory in the town of Fareham. The flagstones and grout were reasonably clean and in good condition but the previous sealer had all but worn off and they were looking dull and in need of revamp.

Slate Floor Fareham Before

Slate Flagstone Cleaning

As the previous sealer had all but worn off I decided not to apply a dedicated coatings remover product such as “Remove and Go” but instead use a strong cleaning solution to remove the remaining sealer and clean the floor in one go. For this I choose a strong dilution of Tile Doctor Pro-Clean mixed with 50/50 with Nanotech Ultra-Clean which adds tiny abrasive particles to the mix. The cleaning solution was applied to the floor with a mop and then left to dwell for 20 minutes before being agitated with a buffing machines fitted with a black Scrubbing pad and stiff brushes along the grout lines.

Slate Floor Fareham Cleaning
The soiled solution was then removed using a wet vacuum and the floor rinsed with clean water and left to dry. We could see at this point that the job was a success and we had successfully managed to clean the floor and remove the sealer in one go.

There was no history of what had been used to seal the floor previously so it’s important to ensure all the old sealer had been completely removed as the old sealer could have been incompatible with the sealer we wished to use and resulted in an unexpected finish.

Sealing the Slate Floor

We sealed the slate flagstones with a single coat of Tile Doctor Colour Grow which really helps bring out the deep colour from within the slate. To finish and build up the lustre and richness of the colour we then applied seven coats of Seal & Go which add a nice low sheen to the surface of the tile.

Slate Floor Fareham Finished
For general cleaning and to get a long life out of the sealer we recommended the use of Tile Doctor Neutral Cleaner, diluted 1:30 with water and applied with a microfibre flat mop, rinse with water and then remove with a clean microfibre flat mop.

Restoring a Slate Flagstone Tiles in Fareham

Cleaning & Sealing Slate Flagstone Tiles in Fareham Read More »

Victorian Tiled Hallway Floor No 21 Finished

Victorian Tiled Hallway Cleaned and Sealing in Portsmouth

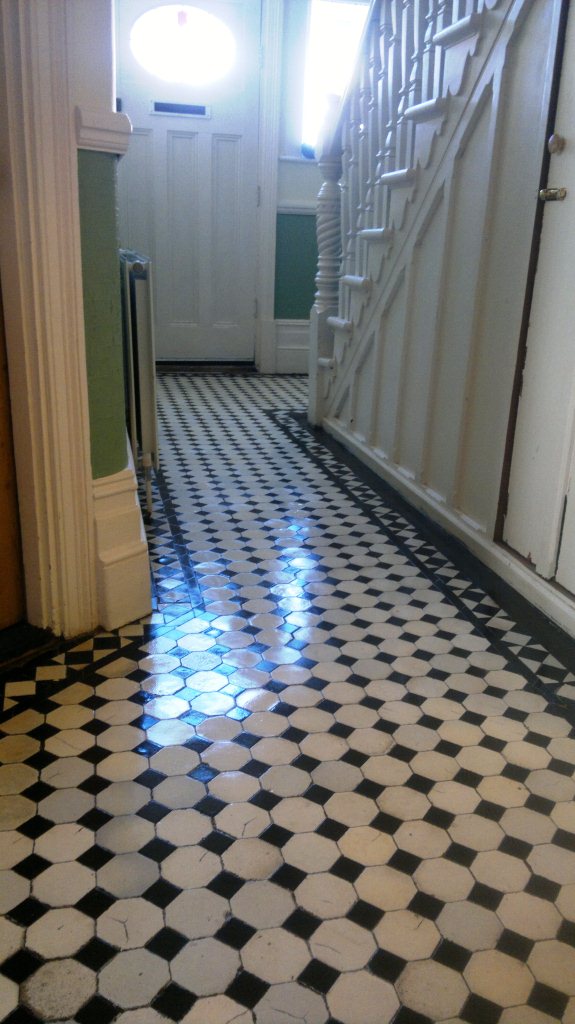
This beautiful Victorian tiled hallway was an original period feature at a property in Portsmouth. Some of the tiles had suffered over the years but it was still intact and functional, it was just in need of a deep clean and seal.

Cleaning a Victorian Floor Tiles

We gave the floor a thorough clean using Tile Doctor Pro-Clean mixed 50/50 with Nanotech Ultra-Clean and then diluted with water, this results in a powerful cleaning agent that’s still safe to use on these old floors. This was left to dwell for a while before being worked into the floor using a buffing machine fitted with a black scrubbing pad. Once we were happy with the floor we used a stiff hand brush to get into the grout joints and cleaned those up as well. The last step was to remove the soiled cleaning product using a wet vacuum and then rinse the floor down with water to remove any remaining chemical before sealing, this last step neutralises the floor which is important as leaving a cleaning product on the floor could upset the sealer.

Victorian Tiled Hallway Floor Before

Sealing the Victorian Tiled Floor

The floor was left to dry overnight and we came back the next day to seal. We were happy the floor was sufficiently dry so proceeded to seal it with four coats of Tile Doctor Seal and Go which is ideal for Victorian floor tiles providing a low sheen finish whilst offering excellent stain protection. You do have to leave each coat to dry before applying the next so it can take some time to apply.

Victorian Tiled Hallway Floor Finished
 

Restoring a Victorian Tiled Floor

Victorian Tiled Hallway Cleaned and Sealing in Portsmouth Read More »

Marble Mosaic Balcony Tile No2 Finished

Polishing Marble Mosaic Balcony Tiles in Bournemouth

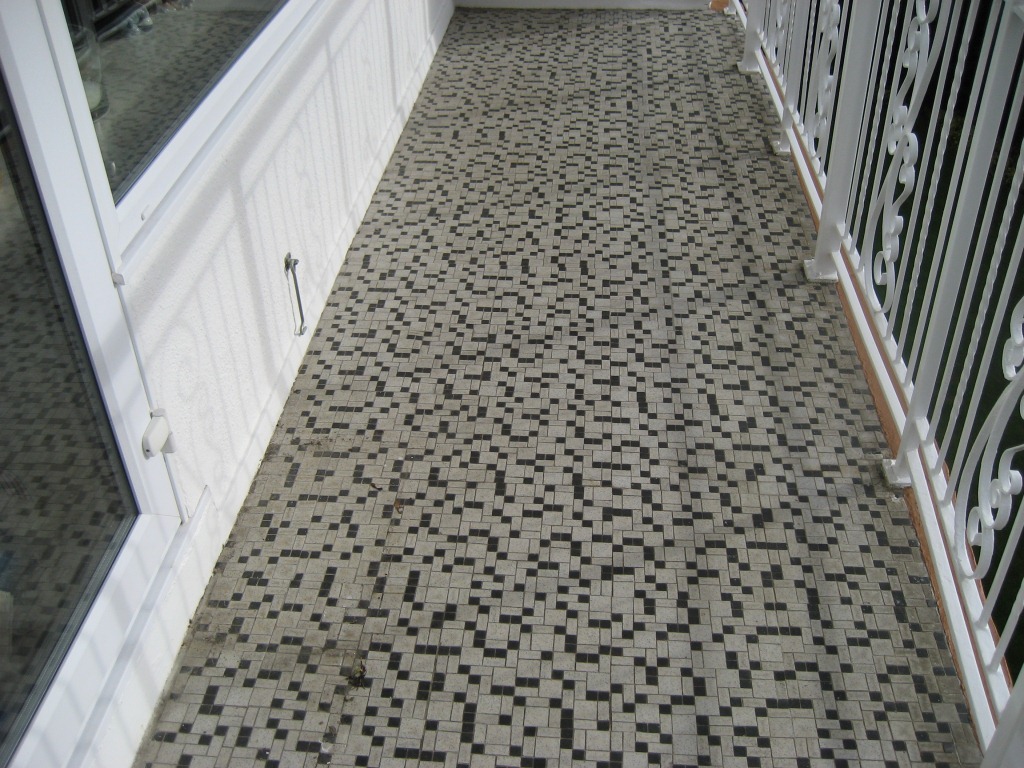
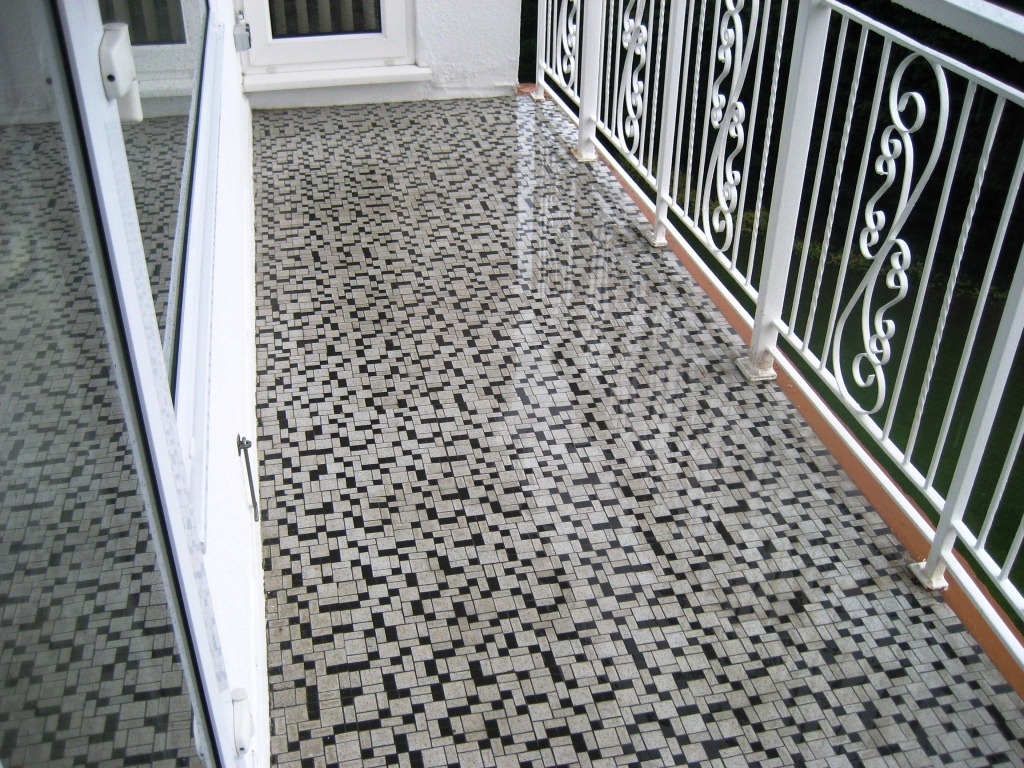
Installed on an external balcony these black and white Marble Mosaic tiles had been exposed to the elements resulting in an accumulated of dirt.

Marble Mosaic Balcony Tile Before

Cleaning Marble Mosaic Balcony Tiles

Marble is a very tough product so for best results we recommend using a set of burnishing pads fitted to a rotary machine that can cut through the grime and re-polish the stone. There are four pads in the set and you start with the Red pad together with a little water, this removes any remaining sealer; next you move on to the White pad again with a little water and this will remove any ingrained dirt. The next two pads, Yellow then Green complete the polishing process and produce a high shine finish. Between pads you need to rinse the floor with clean water to remove loose dirt and grime, I can recommend the use of a Wet Vacuum for this they are excellent at removing surface water quickly.

Sealing Marble Mosaic Tiled Floor

We left the floor to dry overnight and came back the next day to seal the floor. Luckily the weather held out, being external we wouldn’t have been able to seal the Marble if it was wet and it was forecast to rain that day. We sealed the Marble Mosaic tiles using two coats of Tile Doctor Colour Grow which really does bring out the colour of natural stone, it’s also rated for external use and will provide strong and durable protection for the future.

Marble Mosaic Balcony Tile Finished
 

Marble Mosaic Floor Cleaning and Sealing in Bournemouth

Polishing Marble Mosaic Balcony Tiles in Bournemouth Read More »

Travertine Tiled Floor Finished

Cleaning & Sealing Travertine Floor Tiles in Portsmouth

This beautiful Travertine Tiled floor was installed in a Kitchen in Portsmouth; it was in need of a little TLC so the house owner called in Tile Doctor to give it a make over.

Travertine Tiled Floor Portsmouth Before

Cleaning Travertine Kitchen Tiles

Before starting the cleaning we applied clear silicone in order to protect the Kitchen units, otherwise water can soak into the plinths and kicker boards, and this was left to cure while we worked on other parts of the kitchen. There was a paint splatter on one area which we managed to remove using Tile Doctor Remove and Go which was left to dwell for an hour before being agitated with a scrubbing brush, the dirty solution was removed using a wet vacuum and we moved onto burnishing the whole tiled floor.

Travertine Tiled Floor During Cleaning
We stated the burnishing process with a red fitted to a rotary machine with a little water. The burnishing pads are encrusted with diamonds and are very good at removing dirt and sealers from hard stone including Travertine and Marble; the surface water and loose dirt was removed used a wet Vacuum. There are four coloured pads in the burnishing system and they are applied to the stone floor in sequence Red, White, Yellow and finally Green which provides the final polish leaving a high shine finish.

Sealing Travertine Tiled Floor

We left the floor to dry overnight and came back the next day to seal the floor. The floor must be dry before sealing so we test first using a damp meter in several locations to be sure. Once we were happy the floor was dry we proceeded to seal the Travertine tiles using two coats of Tile Doctor Colour Grow which really enhances the colours in natural stone as well providing excellent stain protection. The tile must be dry before applying the second coat so we use an industrial air mover to speed up the drying process.

Travertine Tiled Floor Finished
 

Travertine Floor Tiles Cleaning and Sealing in Portsmouth

Cleaning & Sealing Travertine Floor Tiles in Portsmouth Read More »

Chinese Black Slate in Basingstoke Cleaned and Sealed

Cleaning and Sealing Black Chinese Slate Tiles in Basingstoke

You can see from the photograph below how dirty these Black Chinese Slate tiles and grout had become; the old sealer protecting the tile and grout from stains had virtually vanished because the customer in Basingstoke had been using washing up liquid to clean them. Generally speaking washing up liquid is a degreaser with a slight Acidic PH and over time it can strip the sealer off. This was definitely the root cause of problem in this case in fact the sealer was virtually non existent. In a way this made our job easier as we have to remove any sealer before we can start cleaning.

Chinese Black Slate in Basingstoke Before

Cleaning Chinese Black Slate

The first job we did was to work on the grout lines using a strong solution of Tile Doctor Pro-Clean which we left to dwell on the grout first before working it in with a special stiff brush. Pro-Clean is a strong alkaline cleaner which unlike acidic products is safe to use on all types of stone. To remove the remaining sealer and clean the slate floor we used Pro-Clean again this time worked in with a rotary machine fitted with a scrubbing pad.

Chinese Black Slate in Basingstoke During Cleaning
The soiled liquids were removed and the floor rinsed down with clean water, we find a wet Vacuum machine comes in very handy at this point as there great for removing liquids from floors. We repeated this process a number of times until we were happy the slate tile and grout were thoroughly clean.

Sealing Chinese Black Slate

The slate floor was left to dry overnight and we came back the next day to seal it. The floor has to be dry for this process so we use a damp meter to make sure and we keep an industrial air blower in the van that we can use in case we need to speed things up. To seal the black slate we applied five coats of Tile Doctor Seal and Go which is a great stain protector recommended for slate floors that leaves a nice low sheen on the floor.

Chinese Black Slate in Basingstoke Cleaned and Sealed
Last but not least we advised the customer that going forward they should use a PH neutral cleaning product for regular cleaning and recommended the use Tile Doctor Neutral Cleaner going forward.

Black Slate and Grout Cleaning in Basingstoke

Cleaning and Sealing Black Chinese Slate Tiles in Basingstoke Read More »

=================================

Hampshire Tile Doctor

================================= Read More »
Scroll to Top